
What 300 key fobs looks like and other assorted info
category: offtopic [glöplog]
I had a dream. I say "had" because it's not really a dream anymore if you actually do it, right?


Congrats, Starchaser!

Congrats, Starchaser! Glad you can finally get your hands dirty with this fine piece of technology :D

Thanks guys. :)
A benefit of this is that my rates should be quite a bit lower now, reducing the customs burden. It also means if you want a single custom badge, I won't have to charge as much as $12 to make it economical anymore.
A benefit of this is that my rates should be quite a bit lower now, reducing the customs burden. It also means if you want a single custom badge, I won't have to charge as much as $12 to make it economical anymore.
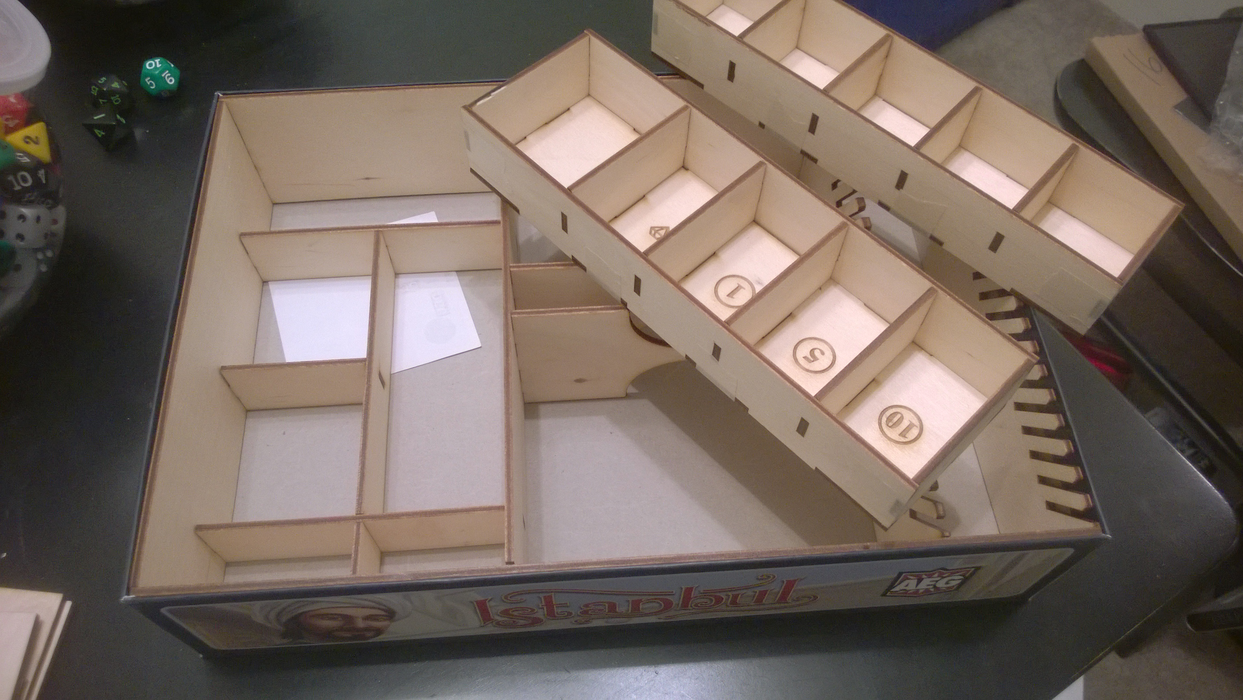
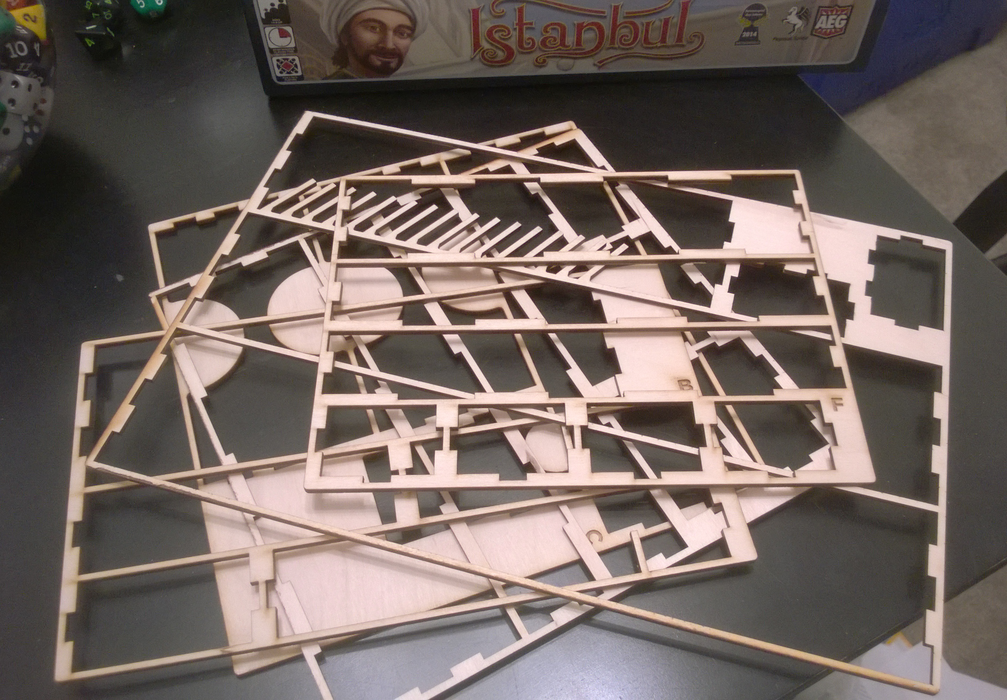
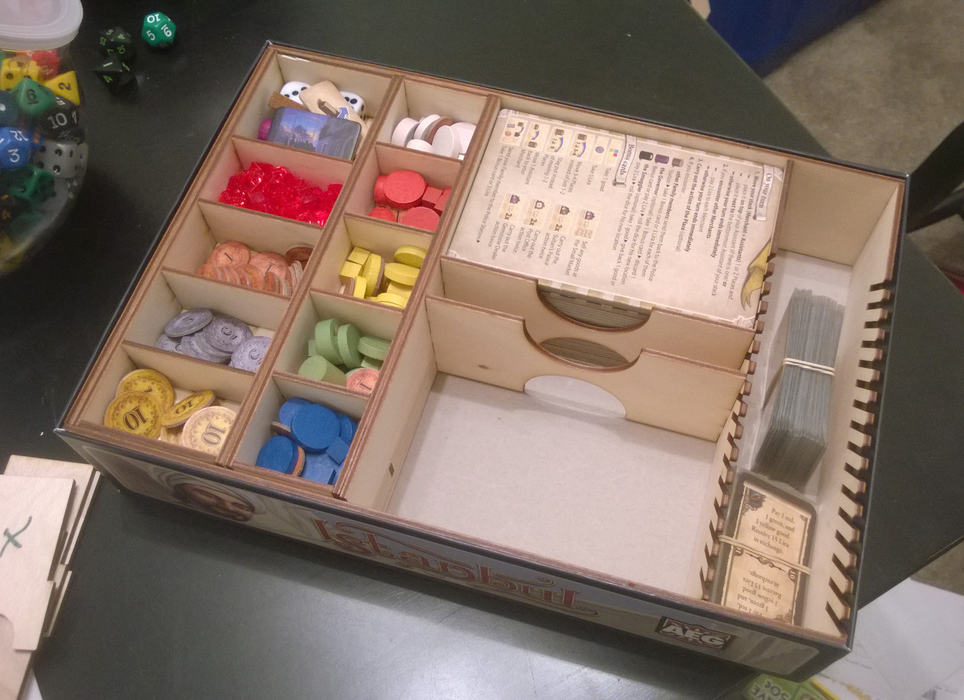
First project off the laser cutter that's not a repeat, a "card", token, key fob, or badge:
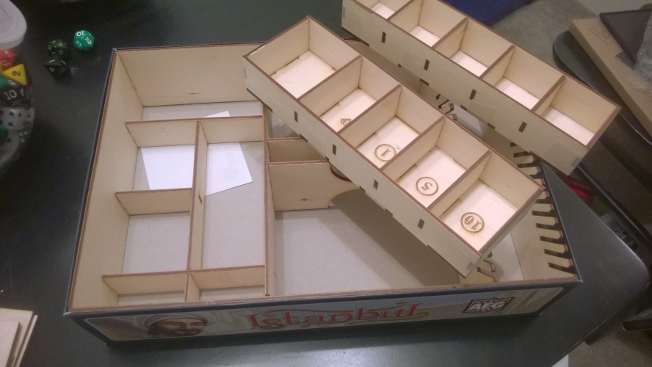
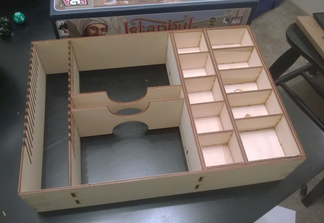

The pieces going in the bottom bins have a decent thickness and won't escape under the low walls despite using the box's floor. Eventually I'll experiment with "sprues" so they can be stored flat still in their sheets. The tape on the component boxes is temporary. I'm going to glue them soon. I may also glue joist joints but I don't think they'll come out. The fit of the outer walls and the box is relatively tight.

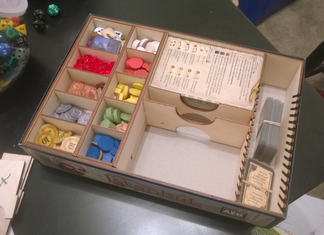
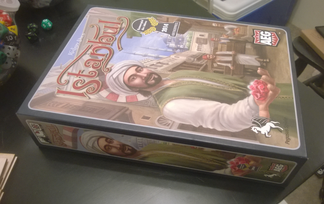
The lid fits on as well as it did with the original contents and insert. It also survived the sideways test of doom in my game bag today: no parts migrated bins or wandered around the rest of the box. I did help it with a kind of "Box Band-It," though. Still a win in my book. It fits the expansion "Mocha & Baksheesh" but until the third expansion "Brief and Siegel" arrives later this year I won't know if that'll fit too.
This does make the box noticeably heavier. However it's not a huge difference and that's the price to pay for not having plastic bags and rubber-banded tiles floating around the inside of an otherwise empty box.

The pieces going in the bottom bins have a decent thickness and won't escape under the low walls despite using the box's floor. Eventually I'll experiment with "sprues" so they can be stored flat still in their sheets. The tape on the component boxes is temporary. I'm going to glue them soon. I may also glue joist joints but I don't think they'll come out. The fit of the outer walls and the box is relatively tight.


The lid fits on as well as it did with the original contents and insert. It also survived the sideways test of doom in my game bag today: no parts migrated bins or wandered around the rest of the box. I did help it with a kind of "Box Band-It," though. Still a win in my book. It fits the expansion "Mocha & Baksheesh" but until the third expansion "Brief and Siegel" arrives later this year I won't know if that'll fit too.
This does make the box noticeably heavier. However it's not a huge difference and that's the price to pay for not having plastic bags and rubber-banded tiles floating around the inside of an otherwise empty box.
I should also note I'm not done with the card slots. They need a bit more work before they can be used as I intended. I'll have to hold off on gluing anything until I fix them as it'll require me to take out the organizer to replace the walls with the angled cuts.

Credits: Salinga (top left), RbR (top right), phunck (middle left)*, elend (lower middle left), RbR (lower middle), iks (lower right), and 002.jpg (bottom).
* Which I just realized I photographed upside down.
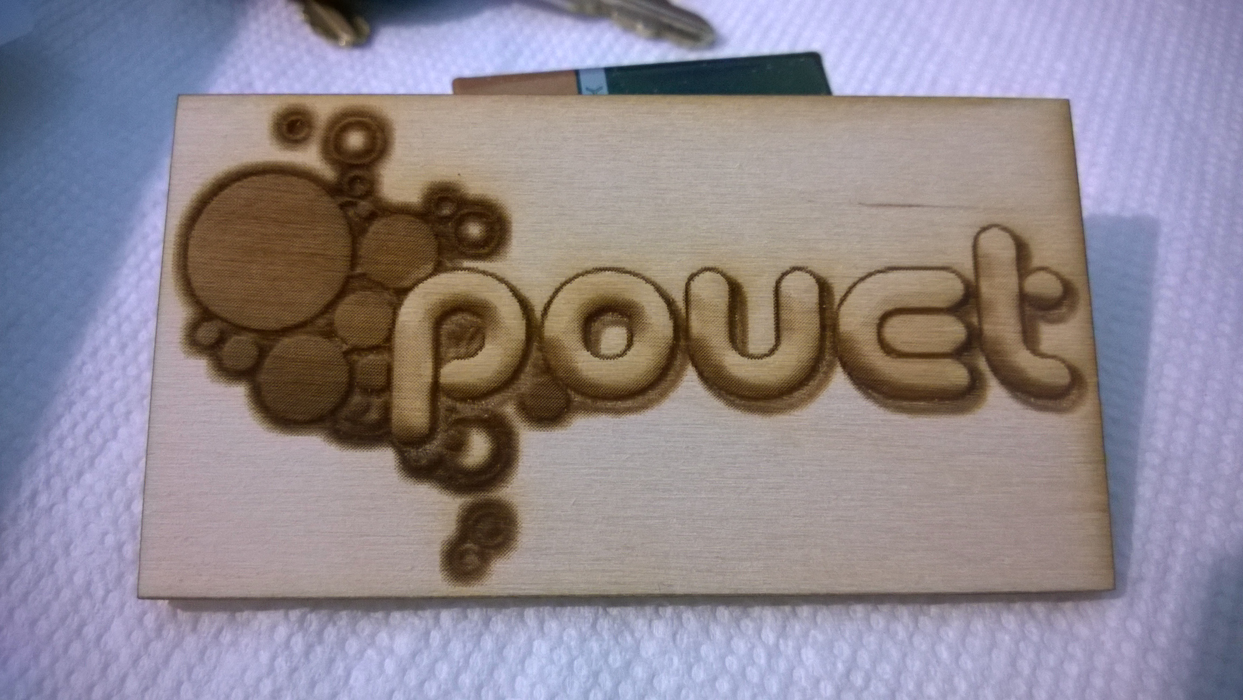
May have been able to do this one bigger, but it pixelated on screen when I did that so I went with its seeming default of having a lot of dots per inch at the expense of being smaller. Maybe I'll try again another time.
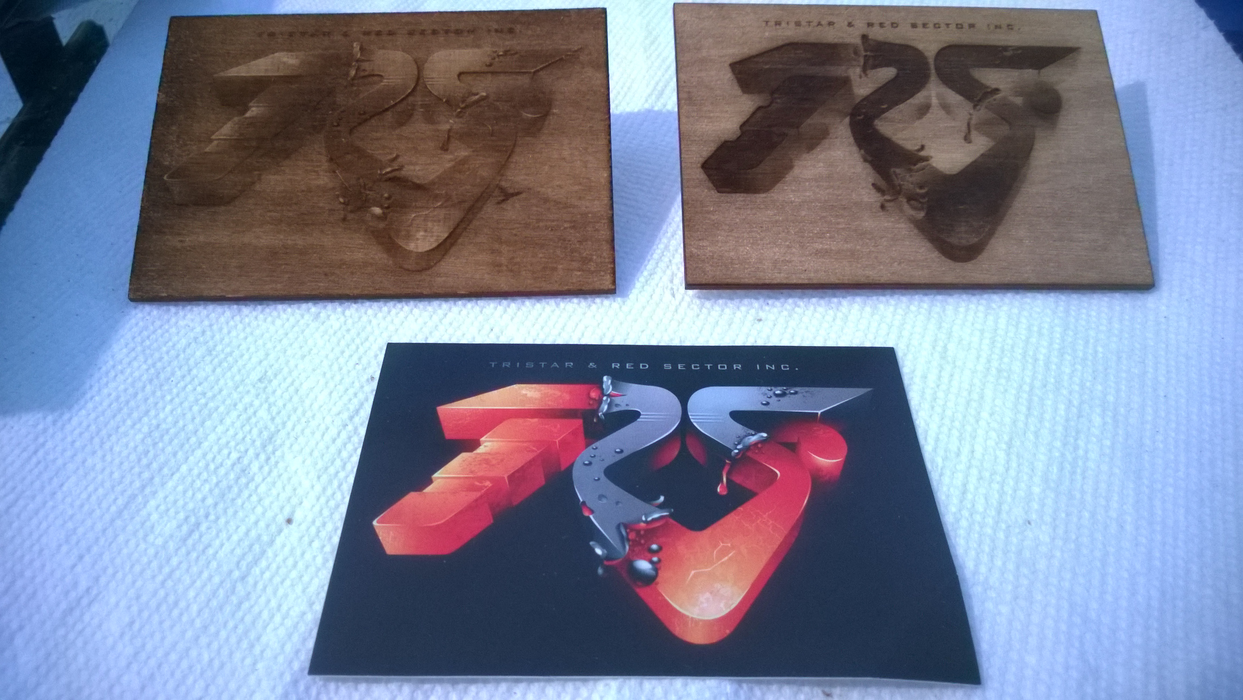
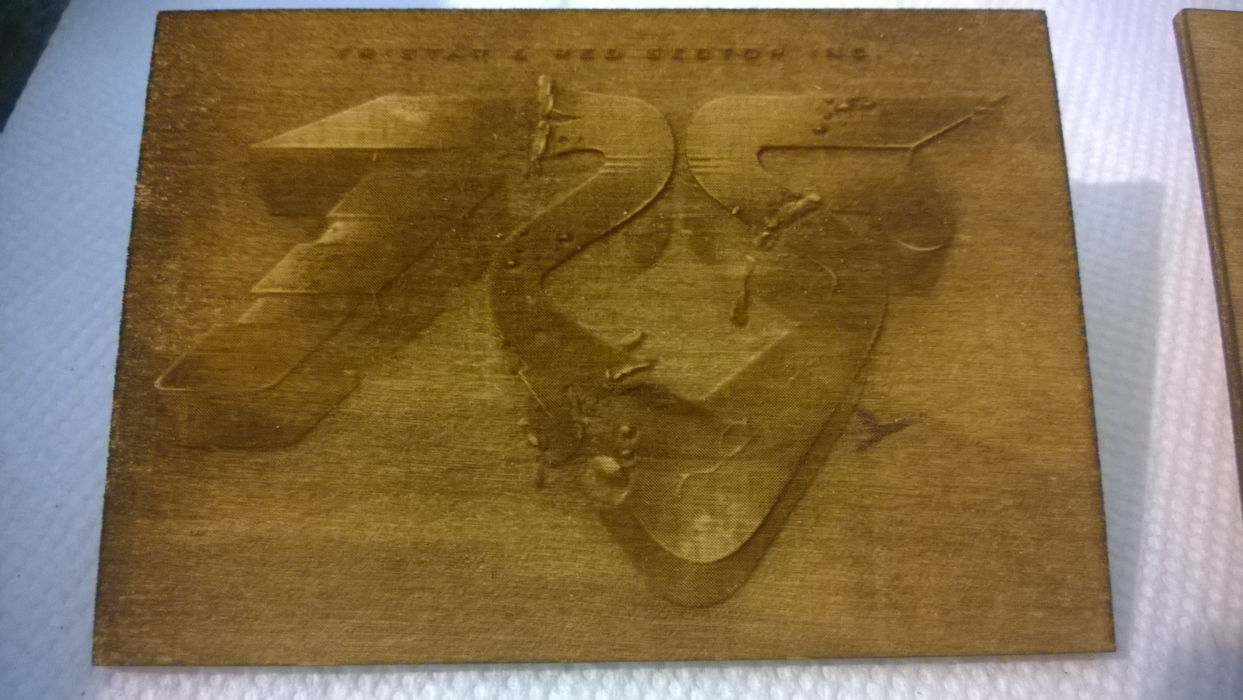
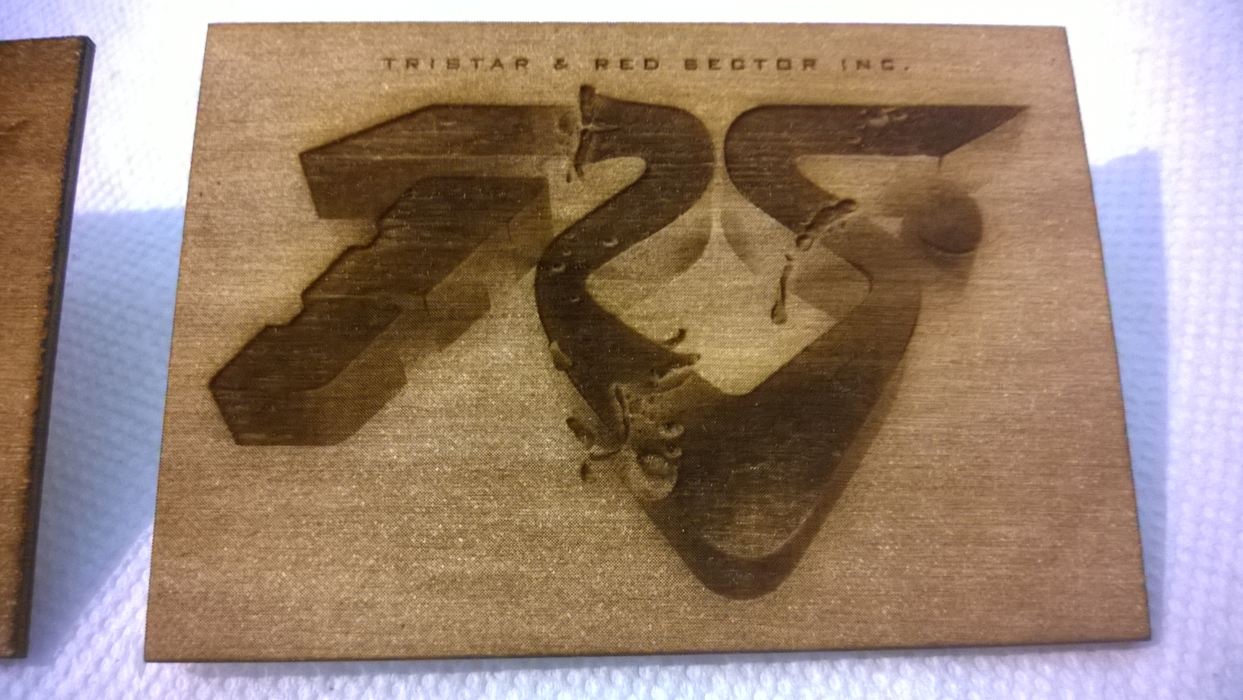
Some TRSI sticker I have, probably got it at Revision. Top right is inverted to see if I could get a bit better contrast, but excepting for the top text I think the regular one is better.
Oh yes, the why: there were three events going on this weekend (four if you count the "private" one I wanted to go to and play board games at), and one of them a good chunk of the core hackerspace crew was going to be at showing off stuff we do and getting the word out. I usually man the space's front desk and caretaking duties during Saturday hours but due to the previous I decided it wouldn't be right to try to get out of it to go board gaming. Not many people came by, so I lasered a legend for the speed and power settings... then kept clicking refresh and lasering logos I liked. Talk about being bored.
wow!

sensenstahl, I need to truly learn the ins and outs of doing images so I can see if there's room for improvement, but by default they make it really easy to do. Those took me almost no work at all, other than scanning the sticker in the case of the TRSI logo. :)
It works very similar to a printer when doing these non-vector graphics, just lasering a grid of really small "dots." Some of the above were 300 dpi, a few may have been 600 dpi, and one may have had a dpi below 100. The machine's software supports higher than 600.
It works very similar to a printer when doing these non-vector graphics, just lasering a grid of really small "dots." Some of the above were 300 dpi, a few may have been 600 dpi, and one may have had a dpi below 100. The machine's software supports higher than 600.
Starchaser, you warm me very heart...
Hires:

By Elko :)
Hires:
By Elko :)

Ooooh. Those last images didn't load last time I read this thread, now I see them. Really cool stuff!
So... could you 'carve' and also texture the surface with that technique?
So... could you 'carve' and also texture the surface with that technique?

My ISP seemed to have dropped me for part of the night so that may have been when the images were off.
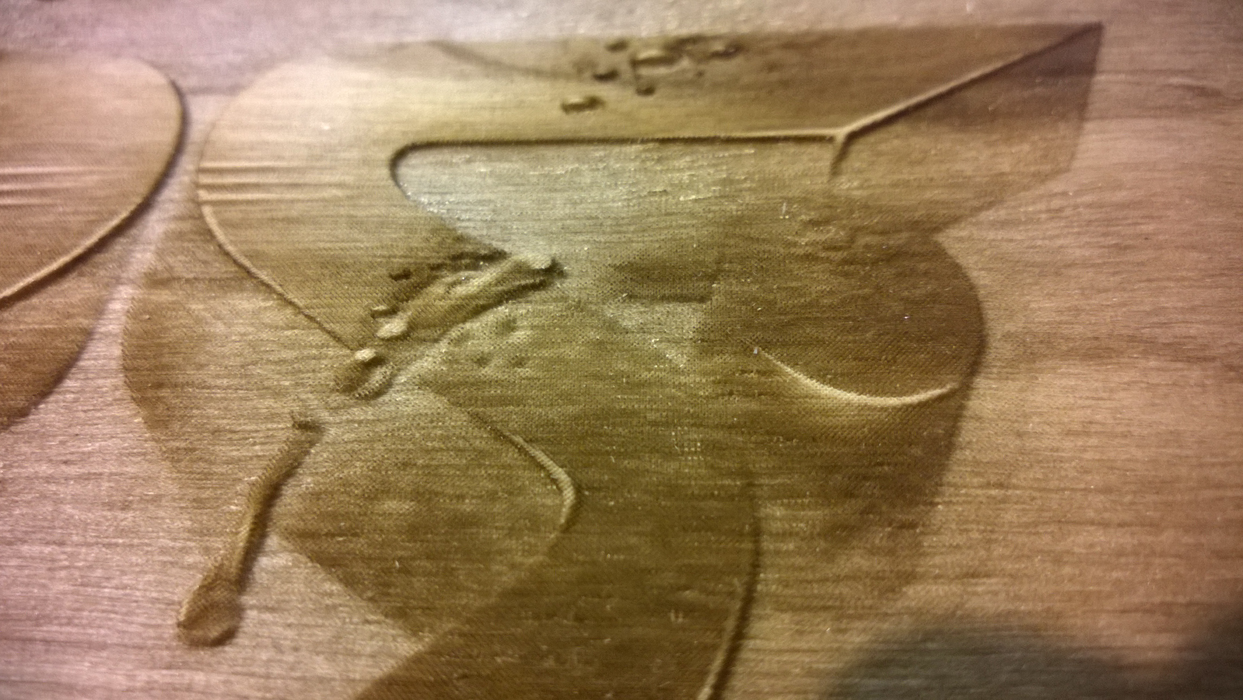
As to your question, I would suppose so... I think that's what it's doing for the TRSI ones. I'm using Baltic birch plywood here, and it has a light veneer. Since the sticker had a black background, it engraved off the veneer (though not uniformly since it was a scan), but then engraved less or more in the areas with the the brighter colors. Inverting the source image caused it to engrave further into the surface instead.
As to your question, I would suppose so... I think that's what it's doing for the TRSI ones. I'm using Baltic birch plywood here, and it has a light veneer. Since the sticker had a black background, it engraved off the veneer (though not uniformly since it was a scan), but then engraved less or more in the areas with the the brighter colors. Inverting the source image caused it to engrave further into the surface instead.
So the comment about being small and pixelated was actually in reference to the Pouet logo by elend. The ultra small one in the first set of logo images. However seeing as you kindly provided a larger original source material for the TRSI sticker I have, I couldn't not give that another go.
Unfortunately I wasn't able to capture a video because my phone was dying and it wasn't charging fast enough to bother waiting.
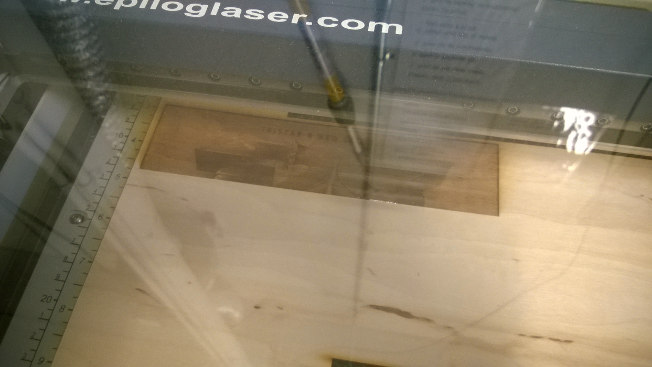
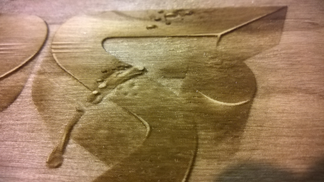
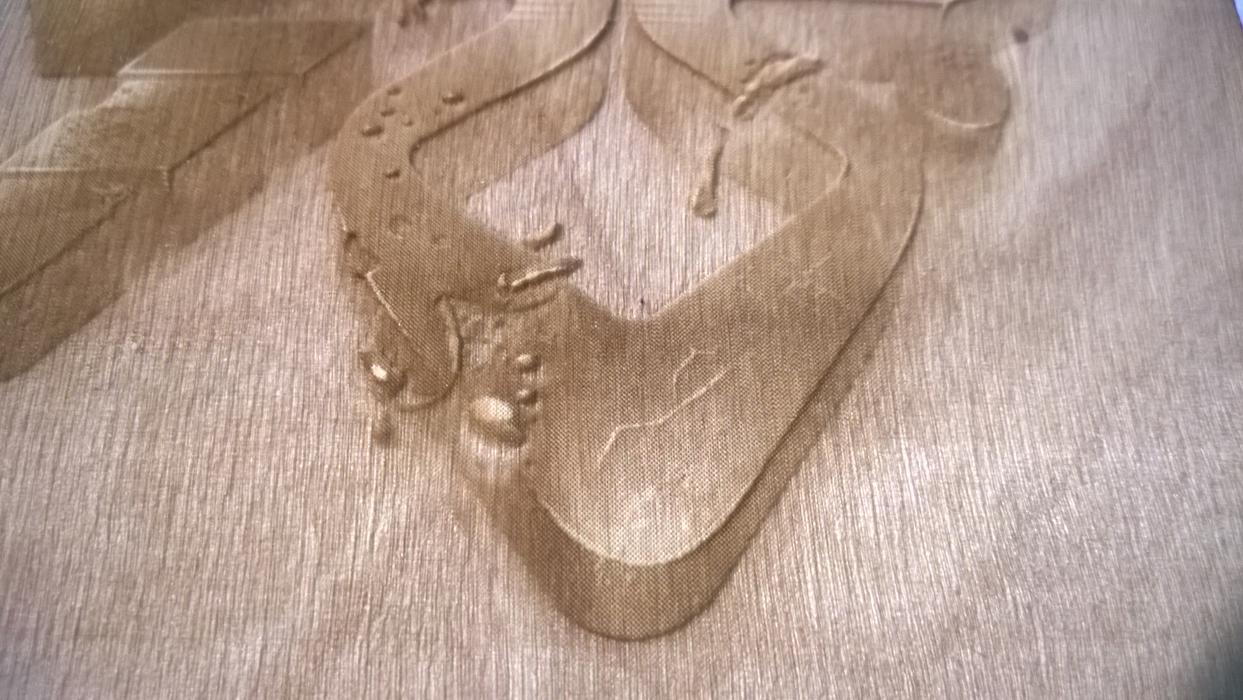
Just an in progress shot, in lieu of video since I did have enough battery for that. The sparkly bits along the lower edge indicate the current location of the head.*
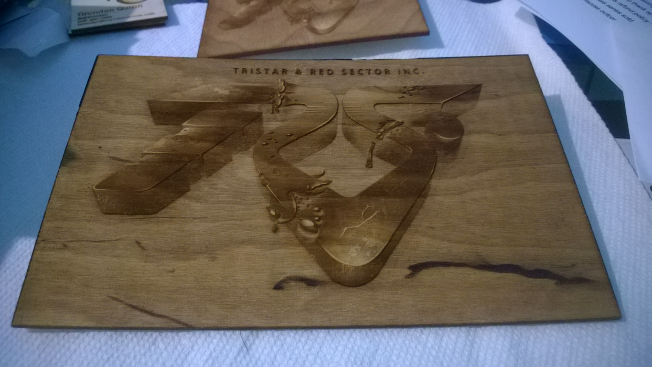
19.6 x 12.6cm It has a definite curve to it as the board was a bit warped or caused by the act of lasering off the top layer.
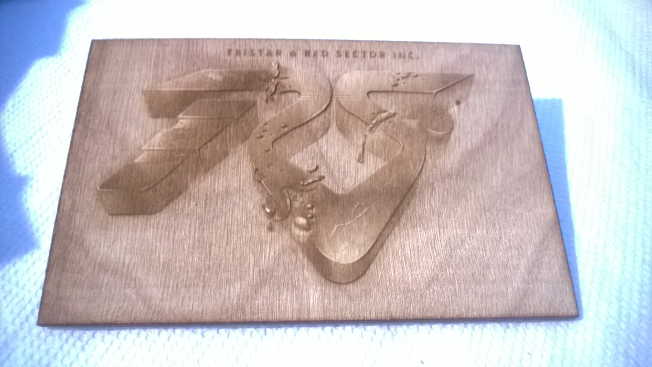
12.3 x 7.9cm This is slightly larger than the sticker and around 300dpi, according to GIMP anyway.
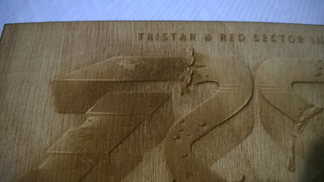
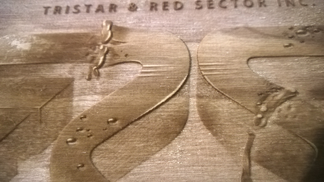

You can click any of these images to see a larger version. It should make it more obvious that they're comprised of a bunch of little points.
I'd be happy to mail them to you, Fell, or Elko (if whereabouts known) if you e-mail me an address via https://lasering.design
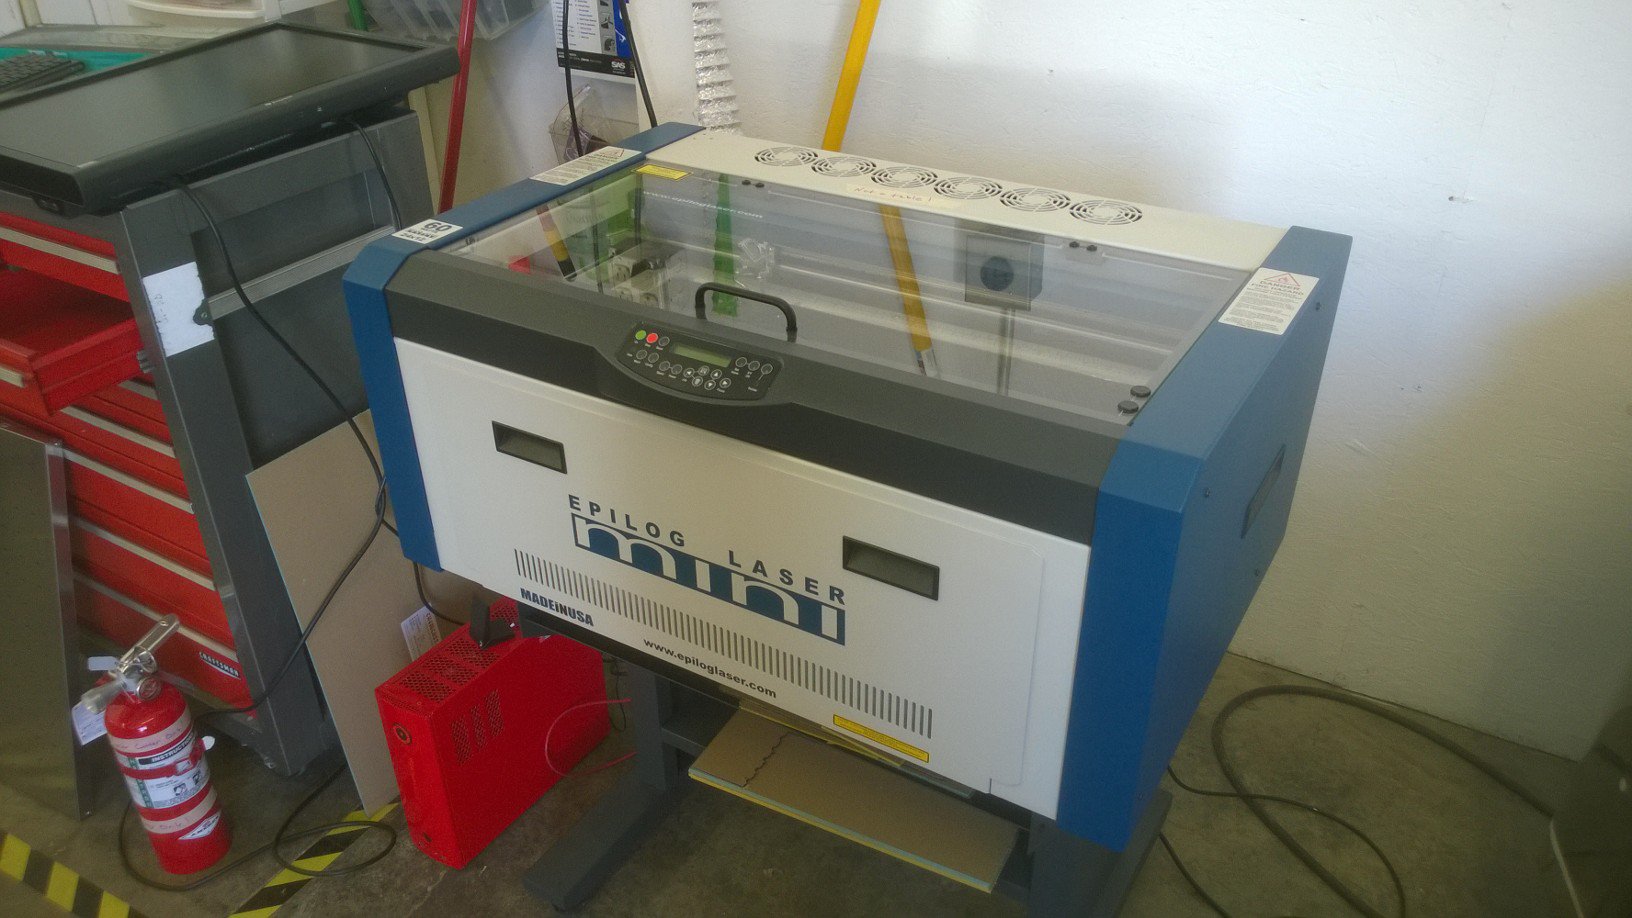
* For those that don't know, most laser cutters, at least the ones I've seen, use a powerful enough laser they have to have a long laser tube. This limits where it can go, and so it goes in the back of the machine along with any cooling equipment. Some are water cooled, mine happens to be air cooled. As a result of the laser's immobility they redirect it from the back via mirrors. (The bar in the center moves front to back, and the head moves across bar left to right. The z-axis/table and x-axis use heavy duty belts, and in all likelihood so does the y-axis.) Thus head itself is nothing more than a lens and a mirror.
For the remainder who think all I do these days is laser logos, I present to you shitty box #1:
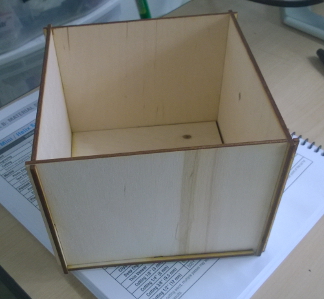
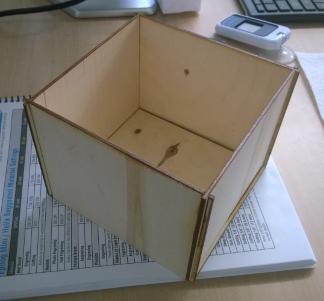
The floor doesn't completely meet the walls, leaving a gap. One or two of the walls when picked up may feel like they're going to just slide off, even though they likely won't due to the way this was assembled. The goal was to have the floor slid in and encased by the sides and the sides have a slot on top on one side and a bottom slot on the other. It took a bit of effort to get them to agree to slide into place without breaking which is why I also think parts won't just start falling off, but I doubt it'll ever be a great box. :) I think I'll stick to the traditional way of doing laser cut boxes in the future.
Unfortunately I wasn't able to capture a video because my phone was dying and it wasn't charging fast enough to bother waiting.

Just an in progress shot, in lieu of video since I did have enough battery for that. The sparkly bits along the lower edge indicate the current location of the head.*

19.6 x 12.6cm It has a definite curve to it as the board was a bit warped or caused by the act of lasering off the top layer.

12.3 x 7.9cm This is slightly larger than the sticker and around 300dpi, according to GIMP anyway.


You can click any of these images to see a larger version. It should make it more obvious that they're comprised of a bunch of little points.
I'd be happy to mail them to you, Fell, or Elko (if whereabouts known) if you e-mail me an address via https://lasering.design
* For those that don't know, most laser cutters, at least the ones I've seen, use a powerful enough laser they have to have a long laser tube. This limits where it can go, and so it goes in the back of the machine along with any cooling equipment. Some are water cooled, mine happens to be air cooled. As a result of the laser's immobility they redirect it from the back via mirrors. (The bar in the center moves front to back, and the head moves across bar left to right. The z-axis/table and x-axis use heavy duty belts, and in all likelihood so does the y-axis.) Thus head itself is nothing more than a lens and a mirror.
For the remainder who think all I do these days is laser logos, I present to you shitty box #1:


The floor doesn't completely meet the walls, leaving a gap. One or two of the walls when picked up may feel like they're going to just slide off, even though they likely won't due to the way this was assembled. The goal was to have the floor slid in and encased by the sides and the sides have a slot on top on one side and a bottom slot on the other. It took a bit of effort to get them to agree to slide into place without breaking which is why I also think parts won't just start falling off, but I doubt it'll ever be a great box. :) I think I'll stick to the traditional way of doing laser cut boxes in the future.
Quote:
Credits: Salinga (top left), RbR (top right), phunck (middle left)*, elend (lower middle left), RbR (lower middle), iks (lower right), and 002.jpg (bottom).
Oooh :) I feel honoured <3

I wasn't intending to post anything today, but I went down to the space to retrieve something I'd left there. I ended up holding down the fort while someone else went and got "breakfast" (that's what they called it, but it was a bit before noon) because we were set to open shortly. So I sat around dumping various settings into files, one setting at a time, to see if I could later reverse engineer their laser settings format for my own personal use. (Would be nice to have a settings file capable of doing a test sheet on a new material all at once without having to set it up by hand.) Eventually I remembered someone saying that it might be interesting to try doing some snow flakes or something and there were a few 3D snow flakes hanging at the place I used to go (Metrix)...
Blah blah blah. Here you go:
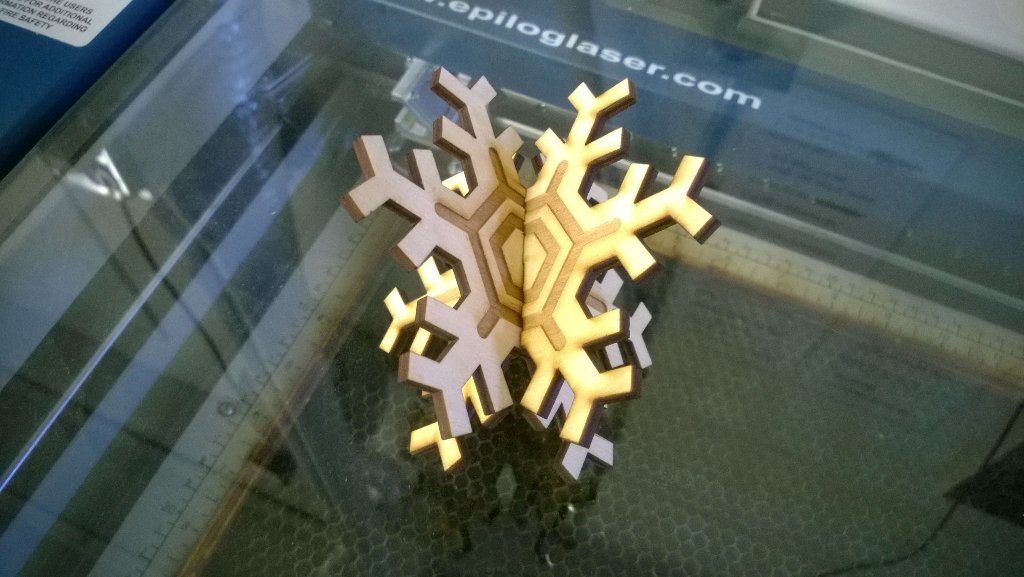
With a small hole on the correct piece you could hang it with some string or fishing line. (First two attempts were too tight; last attempt fit a little loose. I didn't fiddle around for the happy medium so if you drill the wrong one the other half would fall out when lifting it up.)
Video of me making it (It's a peaceful 15 minutes long with no talking, just "laser noise." I didn't speed it up.)
30s clip where I figure out during my first attempt the design I started from isn't symmetrical.
The base artwork I modified. (Public Domain. OpenClipart.org is great.)
Blah blah blah. Here you go:
With a small hole on the correct piece you could hang it with some string or fishing line. (First two attempts were too tight; last attempt fit a little loose. I didn't fiddle around for the happy medium so if you drill the wrong one the other half would fall out when lifting it up.)
Video of me making it (It's a peaceful 15 minutes long with no talking, just "laser noise." I didn't speed it up.)
30s clip where I figure out during my first attempt the design I started from isn't symmetrical.
The base artwork I modified. (Public Domain. OpenClipart.org is great.)
Another quick update, because a few people have told me they actually read this thread yet. I'm thinking of moving it to an RSS feed tied to a real site but I just haven't got around to it yet. Then you could have it delivered right to your usual app or mailbox (with appropriate RSS integration app or something), but I've not got around to it yet.
I had an idea for a new box design, to rescue a few games I had. The image on the left is the box Gloom and Cthulhu Gloom came in. The right is the box I made.
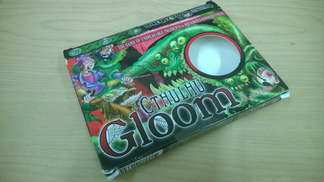
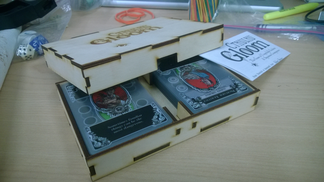
Cthulhu Gloom still ships in that box, which is a shame. Gloom released a 2nd Edition that features a box made of thin pasteboard with a solid rectangular base and a slide on lid like I've designed. The internal dividers are slightly taller than the stack of cards and keep them apart. There's enough room in between to easily lift all the cards out with your fingers and store up to three 16mm dice in there if whatever game you have needs it. The floor is raised up and slotted into the walls based on a suggestion from someone else. I did the lid traditionally to keep the height down and because it would look weird to have an indentation. The lids sometimes fit together by friction as boards can vary, but I used this nice glue called 2P-10 (Thick) to ensure the loose corners held. I'll still use these chromosome-shaped rubber bands I found (look up "box band-its" for an example) to hold on the lid, since due to variances I was afraid of wasting time and wood failing at achieving a perfect light friction fit for it.
As a bonus I found out that another game I got recently, This Town Ain't Big Enough for the 2-4 of Us, also fits inside the same style box without any changes even though it's based around tiles and tokens. It originally came in an oversized custom envelope with a large plastic craft bag to contain everything. Unfortunately the logo for that game didn't have enough contrast to laser well but I wasn't inclined to waste more wood trying again.
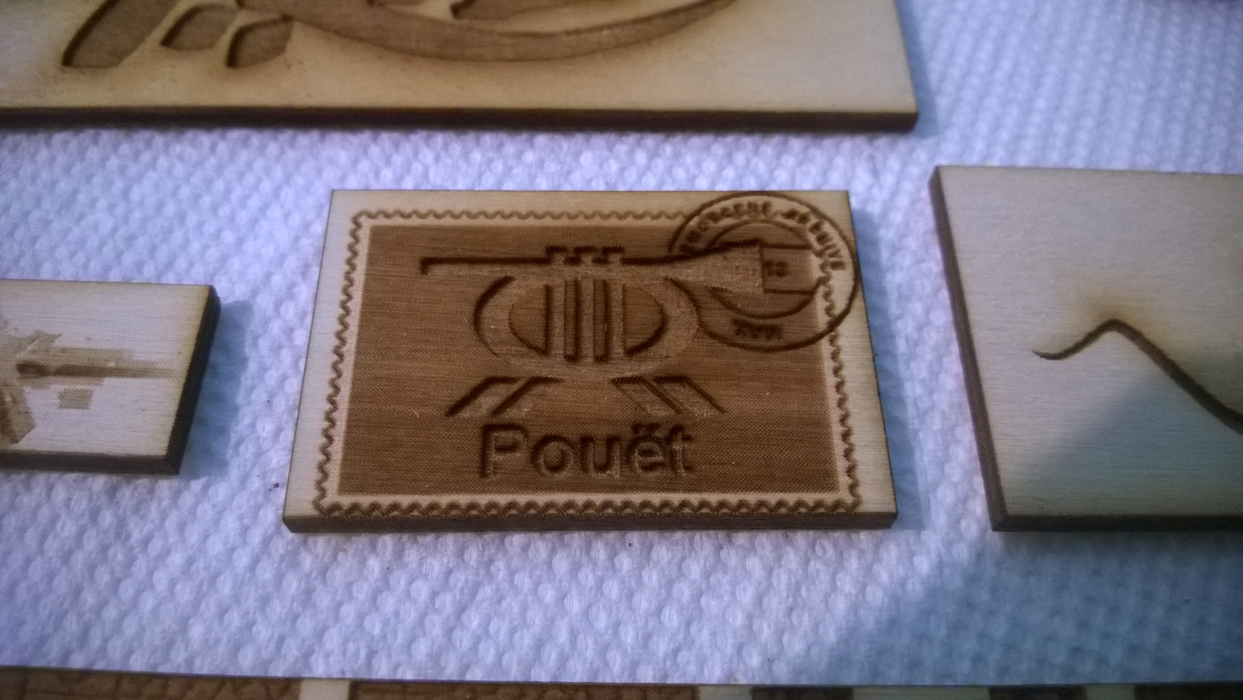
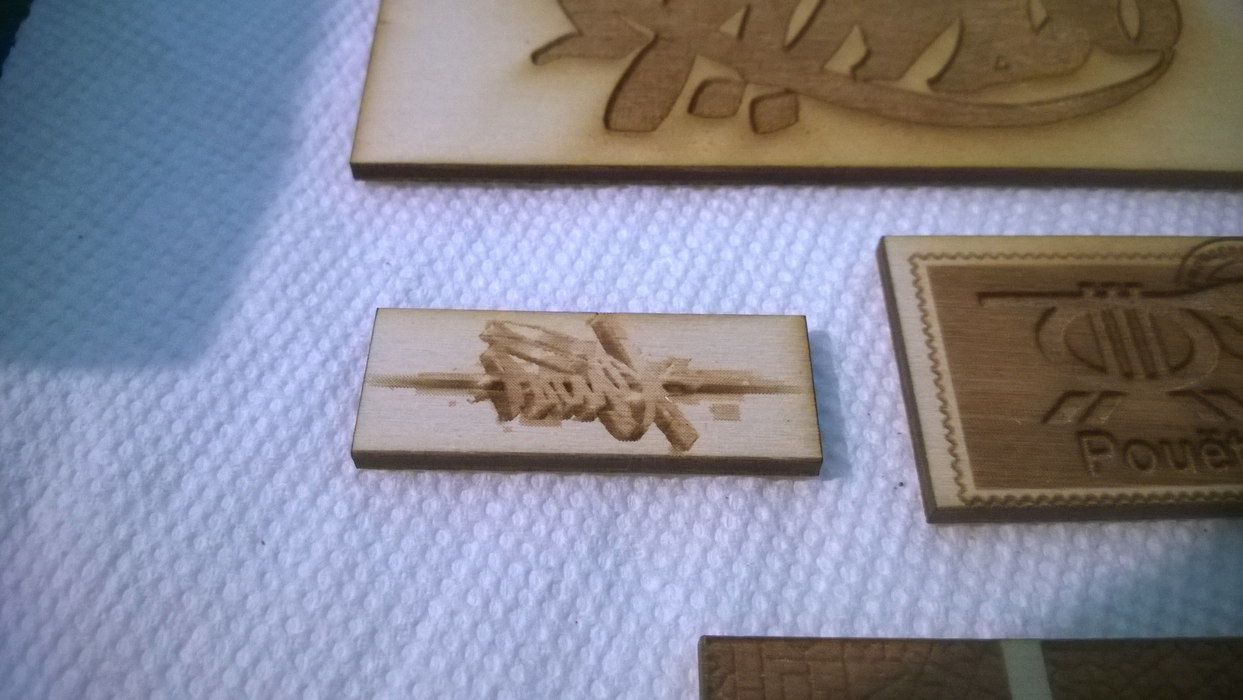
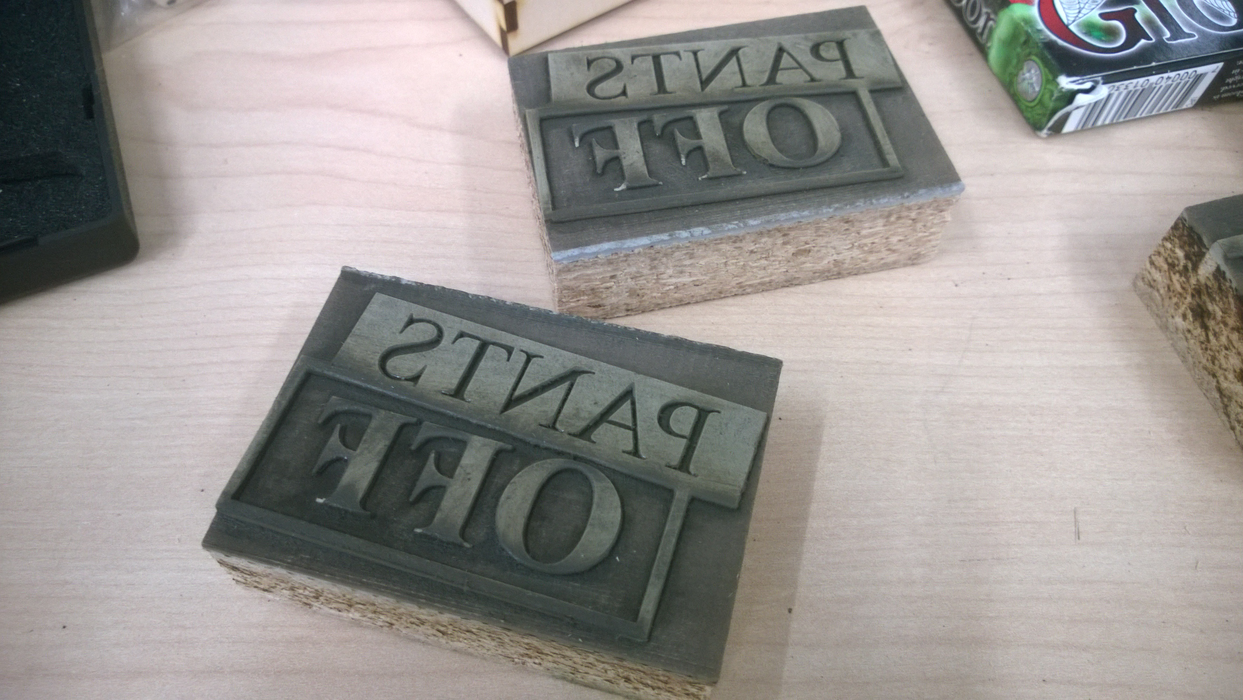
Oh yes, and I finally figured out at least one good setting for doing nice deep linoleum stamps on my machine and did something I'd planned out a while before, for the Danes:

One of them knows, but if DUB doesn't reach out to me, I'll try to find some way to contact them. Unfortunately the serifs liked to break off easily when trying to clean them up a bit. I think I may need to try the laser setting for stamps which should automatically bevel shapes for me, giving them more support. You don't really need the beveling in most cases under normal usage, but it can make it harder to break off small freestanding shapes. In theory they should be deep enough not to transfer ink from the remaining backing linoleum to softer surfaces.
I was told it makes a (bad) difference if you don't clean off the linoleum after lasering it, but I don't really know. Things seem to work well reasonably cleaned, but if you wait too long it becomes impossible to remove the gunk. Some won't come off with simple scrubbing anyway even if you attack it right away, but that's life.
I had an idea for a new box design, to rescue a few games I had. The image on the left is the box Gloom and Cthulhu Gloom came in. The right is the box I made.


Cthulhu Gloom still ships in that box, which is a shame. Gloom released a 2nd Edition that features a box made of thin pasteboard with a solid rectangular base and a slide on lid like I've designed. The internal dividers are slightly taller than the stack of cards and keep them apart. There's enough room in between to easily lift all the cards out with your fingers and store up to three 16mm dice in there if whatever game you have needs it. The floor is raised up and slotted into the walls based on a suggestion from someone else. I did the lid traditionally to keep the height down and because it would look weird to have an indentation. The lids sometimes fit together by friction as boards can vary, but I used this nice glue called 2P-10 (Thick) to ensure the loose corners held. I'll still use these chromosome-shaped rubber bands I found (look up "box band-its" for an example) to hold on the lid, since due to variances I was afraid of wasting time and wood failing at achieving a perfect light friction fit for it.
As a bonus I found out that another game I got recently, This Town Ain't Big Enough for the 2-4 of Us, also fits inside the same style box without any changes even though it's based around tiles and tokens. It originally came in an oversized custom envelope with a large plastic craft bag to contain everything. Unfortunately the logo for that game didn't have enough contrast to laser well but I wasn't inclined to waste more wood trying again.
Oh yes, and I finally figured out at least one good setting for doing nice deep linoleum stamps on my machine and did something I'd planned out a while before, for the Danes:
One of them knows, but if DUB doesn't reach out to me, I'll try to find some way to contact them. Unfortunately the serifs liked to break off easily when trying to clean them up a bit. I think I may need to try the laser setting for stamps which should automatically bevel shapes for me, giving them more support. You don't really need the beveling in most cases under normal usage, but it can make it harder to break off small freestanding shapes. In theory they should be deep enough not to transfer ink from the remaining backing linoleum to softer surfaces.
I was told it makes a (bad) difference if you don't clean off the linoleum after lasering it, but I don't really know. Things seem to work well reasonably cleaned, but if you wait too long it becomes impossible to remove the gunk. Some won't come off with simple scrubbing anyway even if you attack it right away, but that's life.
Oh yes, and at some point I'm sure I said "I've moved on. I don't revisit things." but I'll have to narrow that to mean "I don't revisit sheets of things."
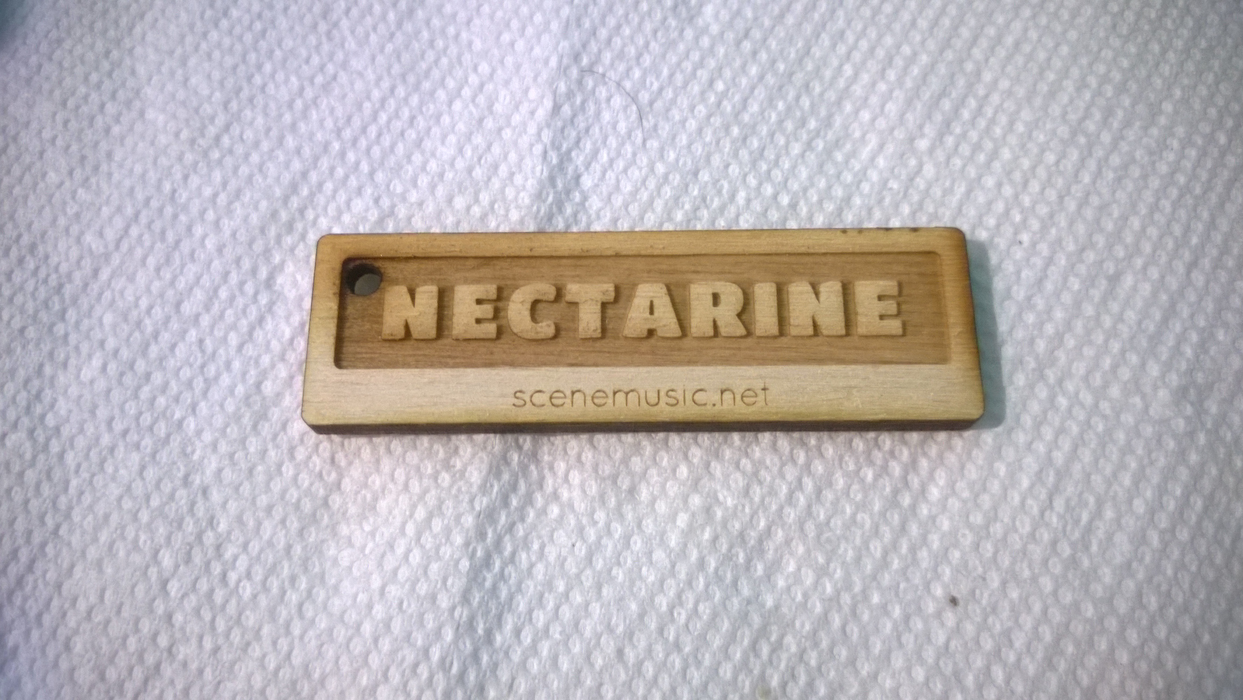
This is what a Nectarine key fob looks like on my machine:
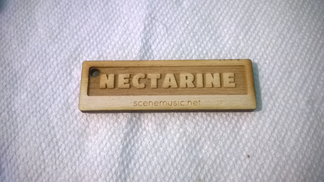
Also instead of etching the website I set it to be engraved which I think looks nicer here though could use a bit more contrast perhaps. This is honestly how I expected the first batch of key fobs to look but the plywood I used wasn't as nice as this. Interestingly, and fortunately, people liked how the originals looked and so I used up the remainder of the wood making more of them and Revision ones. I can engrave both sides, same as before, but the back side turned out similar to the front so there was no point in taking a photo of that.
This is what a Nectarine key fob looks like on my machine:
Also instead of etching the website I set it to be engraved which I think looks nicer here though could use a bit more contrast perhaps. This is honestly how I expected the first batch of key fobs to look but the plywood I used wasn't as nice as this. Interestingly, and fortunately, people liked how the originals looked and so I used up the remainder of the wood making more of them and Revision ones. I can engrave both sides, same as before, but the back side turned out similar to the front so there was no point in taking a photo of that.
Quote:
but if DUB doesn't reach out to me
Consider yourself reached out to ;)

Why the hell did I press submit?
Oh well .. we definitely need to talk about several stuff, we already have something planned that needs to be made, but also something else in the pipeline. I have more or less missed everything about this thread, will look into it when I get home from work.
Oh well .. we definitely need to talk about several stuff, we already have something planned that needs to be made, but also something else in the pipeline. I have more or less missed everything about this thread, will look into it when I get home from work.
I kinda meant email so I can ask you where to send them. ;) Anyway, I don't know that there's much else about this thread of interest to you aside from the stamps though, since you already know about the awards I did for TRSAC last year.* There's actually four of those stamps, but I took the photo before I made the remaining two.
* Well okay, this post may be, since it impacts what I charge, in a good way.
* Well okay, this post may be, since it impacts what I charge, in a good way.
Well, if the shipping destination is any different from last time that is... plus email is better for longer conversations than Pouet anyway. :)
This isn't mine, but I thought it was cool: laser engraved opal done at my old laser cutting haunt, Metrix Create:Space in Seattle. (I'd embed the picture, but apparently it's relatively large.)
I also posted my deck box above to my store, as my 2nd (after the marble experiment), non-demoscene thing I've tried to sell. This isn't a promotion. I know it's not largely in the interest of many demosceners. I just think I may have finally "arrived." :) Let's see where this takes me. (I can also offer it on demand in a way, since with production so close to home I don't have to make a large number of them ahead of time, which I end up giving away later if they don't sell.)
I also can now do something I previously considered impossible: on-demand products. Since my machine is only 10-15 minutes away from home, and 5-10 from work, I don't have to make a whole bunch of copies ahead of time if I want to sell something. We all know from my past that didn't work, and I ended up giving them away the year after.
I'm also trying something interesting. I've released the design as CC BY-NC-SA. It's an experiment. I figure the convenience of buying it from me will outweigh the free access to the design if you don't have easy access to a laser cutter. If it doesn't work, then I just don't release future designs in that manner. You can view them on Bitbucket.
Next up? Finishing the design for my Istanbul box I'd think, then maybe do what everyone does: design a dice tower? :) I also kind of want to make a vertical gravity-assisted tile dispenser for Infinite City.
Apologize if you were expecting something more spectacular when this thread floated back up to the top.
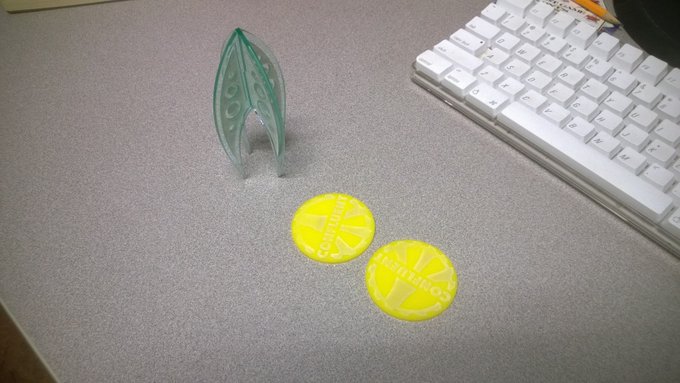
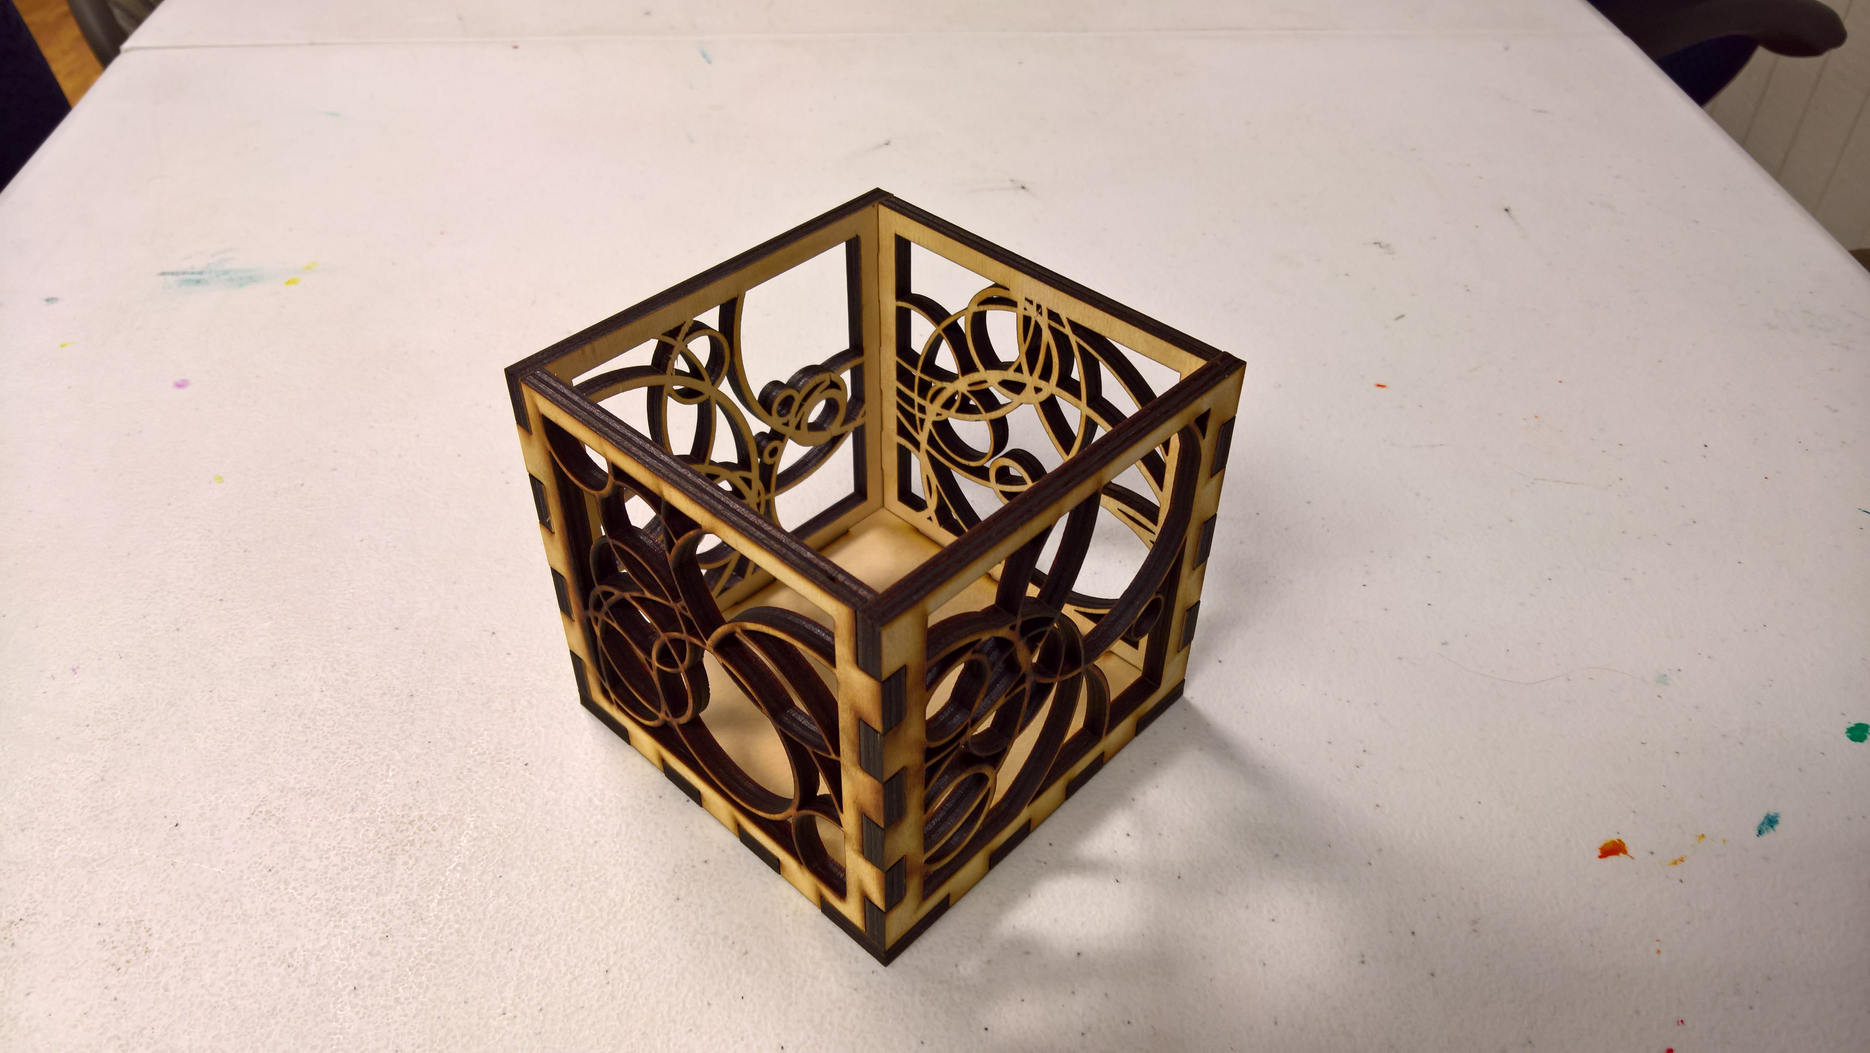
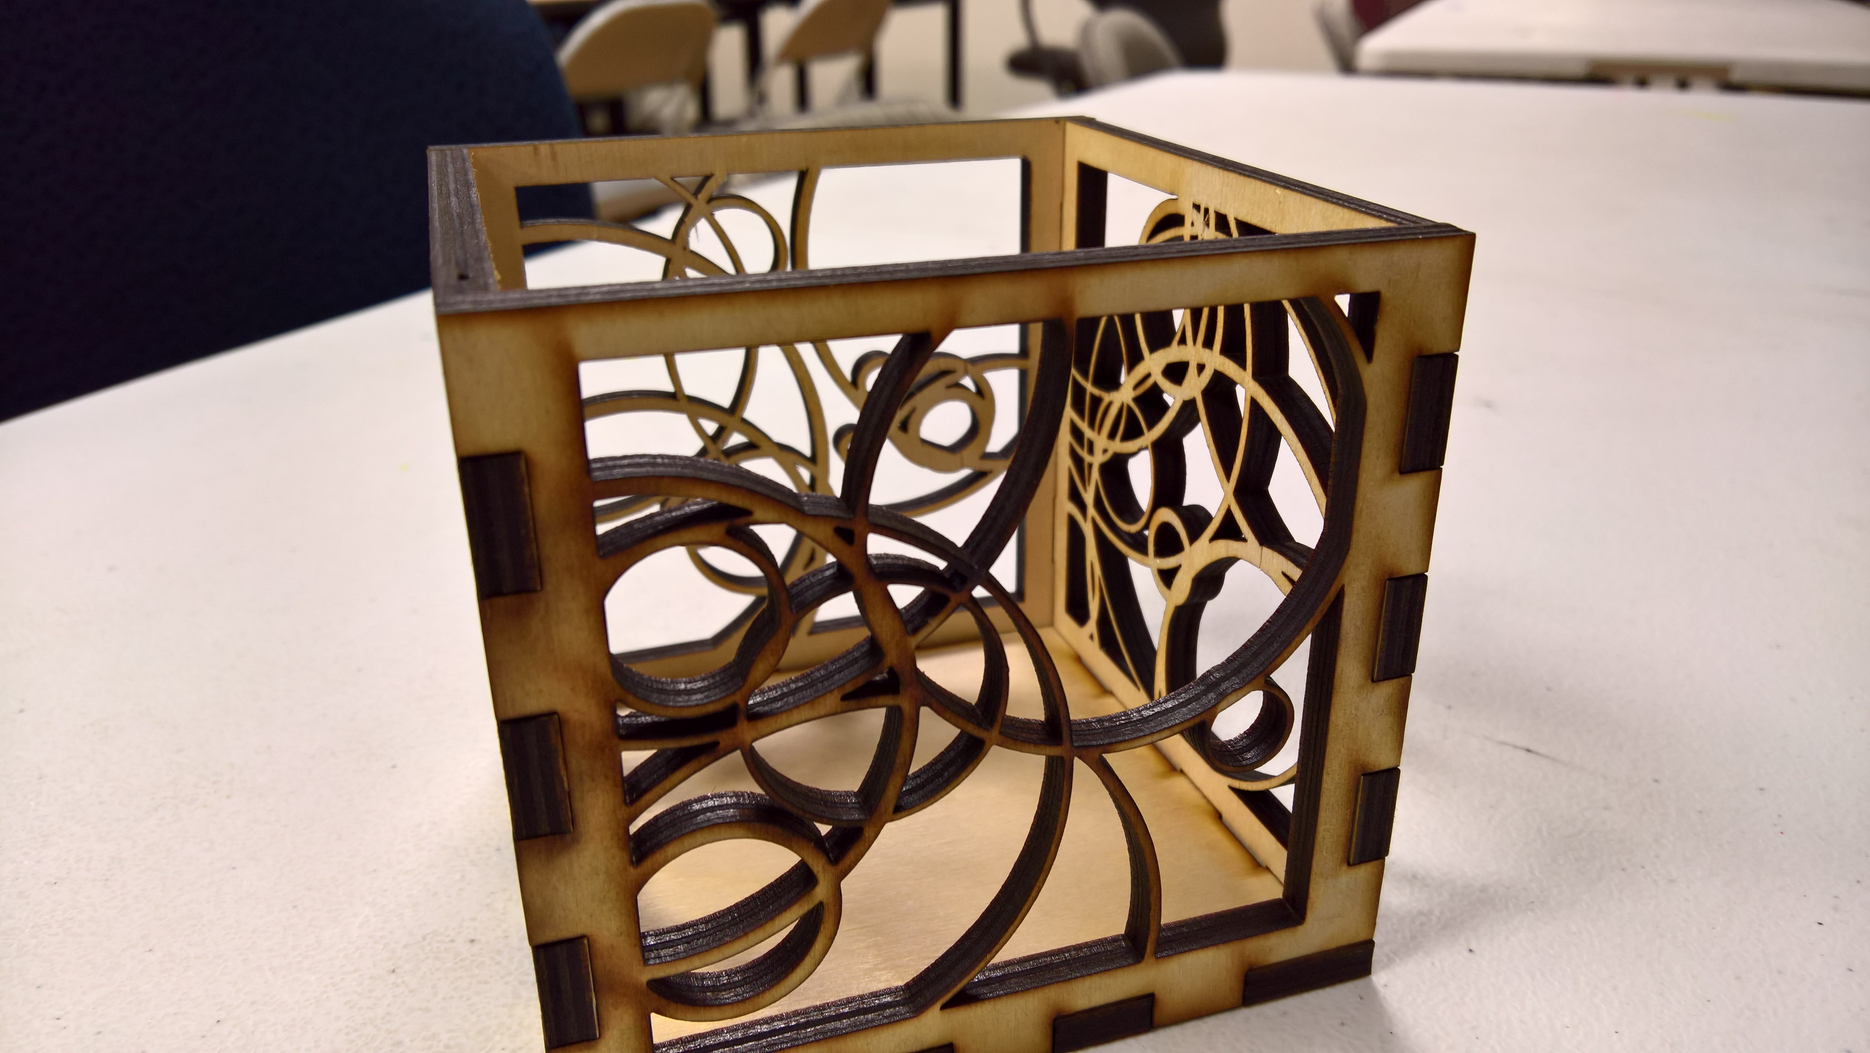
Makerspace was trying to come up with ideas for classes. Don't know why, but it popped into my head to look up laser cut tea candle holders. Tea candles are usually very small, on the order of 1.5" in diameter and not very tall. Sometimes they come in a little glass "cup." So they don't pose much harm to a plywood structure unless you purposely set it put a big flame really close to the edge or tilt the flame onto the structure. I figured I'd need some sort of prototype to be able to promote the class with a picture the space had the rights to, and so that I could have a blank template ready with proper fit. The end goal is that people can learn to use Inkscape (mostly because it's free) but really so they can put shapes into a blank template and I'll cut it out for them. Will have to see how it goes. Even if they don't use it with a candle, it can still be a neato box.
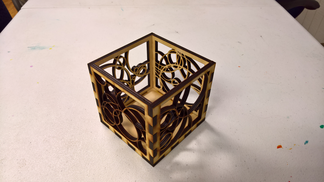
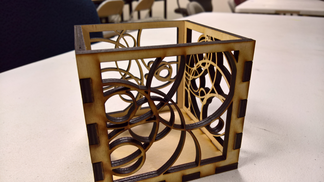
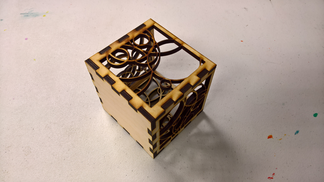
I made the above design by generating random rings of varying sizes and location. The maximum ring size was the width of the "cutting safe square" and they range from 3mm to 5.99mm because I screwed up and forgot that the random output had a range of [0,1). I then spent many hours differencing the circles in Inkscape, with many saves and undos. Even then, I still made two mistakes which you can see in the photo above. However, art is art, and it's not going to be the same for everyone. Therefore I'm not going to redo the sides even though it does bother me, just slightly, knowing that. There's also a tooth missing the veneer on the inside (so it's hard to tell) which I should have re-cut but it took long enough to get to what you see I decided not to bother there either. When/if I eventually get a hold of a tea candle, I'll try to remember to post pictures with the lights off or dimmed and the shadows it casts.
If you find the mistakes, you win... 2 scene points, I guess?
That looks awesome!