
What 300 key fobs looks like and other assorted info
category: offtopic [glöplog]
StarChaser, if you are selling something professionally, do you have a webpage maybe ?

Well, yes, and no ... I mean so far it's mostly a hobby, not a main job. More or less because I do have a non-hobby job with pressing demands and I have to travel so far to get this sort of stuff done. As a result I've never really cobbled together more than this thread, a few other random postings, the notice on my "group"'s site, and the Squarespace store. It's hard to say a lot about prices or things I do, though it's possible to sort of give guidelines of what works and doesn't based on past experimentation as well as available materials I have or can use that with support am able to buy.
If the local group trying to start a hackerspace that I have joined ever actually gets around to having a space where I am able to host my own laser cutter, which is a goal of mine, then it may mean more to have something more singular and professional in terms of collecting the photos I've posted here in to a proper gallery as well as the standard questions and such I can answer as alluded to above. Perhaps not having these things is a turn off for some, but on some level I'm happy not being crushed by hobby work and also a little ashamed of the prices I have to charge until I can have a local resource under my control.
I don't know if this answers your question, but hopefully provides some info in that direction. If there's anything in particular you'd like to know you can ping me directly by e-mail, which is available from both the links above, or post here, and I'll do my best to answer it.

Thanks for the info Starchaser.
Very interesting story.
I'll try to get in touch with you indeed having finally found your email.
Very interesting story.
I'll try to get in touch with you indeed having finally found your email.
Quote:
Had a bit of a rethink. I'm not going to arbitrarily choose to do kewlers fobs for the fun of it, but that doesn't mean you can't contact me to have something made if you wanted. However I'm still not doing a Poo-Brain logo until they have something that's not the brain-shaped group of naked people. (Sorry guys.)by Maali:
kewlers fobs or revision never happened!
On to other things. I was board gaming on Friday until 1am or something--yeah great choice when I have to drive 3.5h in the morning--and overheard someone from the second table saying the start player token [for Ad Astra, iirc,] was too small and was hard to notice. I got back too late to mock up something that night, but as my main reason for being out at the hackerspace was a job that would take an hour and fifteen minutes per sheet I had some time to spare and did the designs out there based on some things I already had, openclipart.org (the die), and a link I found on a BoardGameGeek comment thread (the meeple). It's always nice when I can find what I want in a relatively clean SVG.
I used one of my key fob designs for a starting point and decided to leave it in, so they have a ring hole making it possible to use one as such in addition to the intended purpose. Since this was just a quick thing for fun, the meeple in the second design is just scaled to fit the height which leaves more room to the right of it. I didn't bother to move the text left and reducing the width. There might be some benefit to both being the same size.

This is what one looks like with no extra work done to it. Only the paper backing has been peeled.


On the left are the two designs before peeling. On the right is after masking. The tape didn't want to adhere to the paper as well as it had in the past, but it doesn't really matter if it does or not, just so long as it makes it much harder for paint to get in and down the sides. I've found that I have to fold the tape over for this to work; if I just slap it on the sides sticking out vertically, paint will find its way down somewhere along the edge.


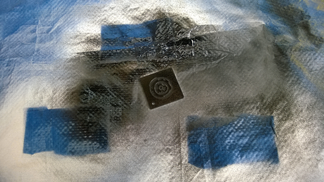
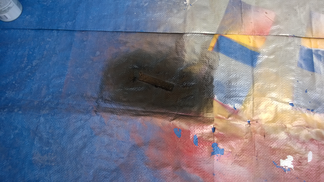
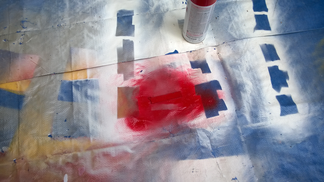
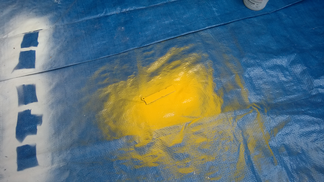
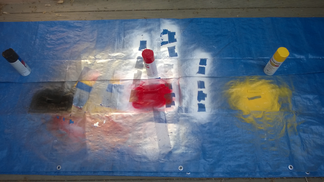
On the left, a process shot. Just a tarp I bought at the local hardware store out on my tiny balcony. I believe there is a board game where the first player is chosen by whoever was last on a balcony. I don't remember the name though. On the right is after two coats of spray paint 45 minutes apart and the tape peeled off. As the ring hole is in the area I wanted to paint it couldn't be masked off and is white inside. Friction will remove it pretty quick if these are actually used as key fobs.


This is after the paper backing is peeled. They look pretty nice, especially considering I was kinda worried before I painted them that they'd have looked better with the shapes and letters engraved instead of engraving around them as you see here. I did it this way because I had thought the die raised up instead of sunken would look good. and I was right. The picture on the right is the back side of the translucent meeple one. I sometimes wonder if I shouldn't engrave my designs backwards so they look good from that side, but there's more contrast on the front side. Might look good in an edge lit piece (LEDs or such) though. (I already know these'll glow when you do.)
Quote:
It's still a hobby, but I've now got a better website for it. :) It doesn't have a gallery with a distillation of this thread, but that may come.by Baudsurfer:
StarChaser, if you are selling something professionally, do you have a webpage maybe ?
For those who read this thread, if I'm missing anything you'd think it would be good to know please tell me. Thanks.
Oh, if it doesn't show up yet the DNS may still be propagating for the new subdomain. However the DNS company I use set the TTL incredibly low so it shouldn't be too long before it appears for you. (I can already see it.)
I shouldn't be up, but I am anyway. I've now got an alias for the new website http://lasering.design/. (I was unable to secure laser.design) There's no valid HTTPS for the domain, not that you can buy anything there, because it's on the same server as my other domain, I only have one certificate, and I didn't configure SNI. The new TLD went live for general access only two days ago, and this was definitely on a whim and not premeditated. I originally ignored the TLD when I got the advance e-mail about pre-registration back in April. (Don't bother pre-registering. There's no guarantee you'll get it and what my registrar did promise didn't happen.)
If you still see word link ads on a parked page, then it's still propagating. I dislike that they were trying to make money off of my new domain by default before I was able to configure it ... If you get back the address 0.0.0.0 then that means it did propagate but you didn't get the second propagation yet. I added it to my DNS provider when I bought the domain but forgot to set up the record with the IP address of my server until a bit ago.
Zz.
Yup. Dredging it back up.
Revision:
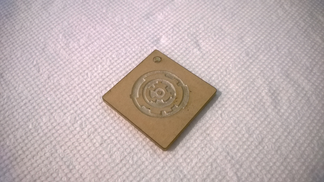
Edges and hole were painted by accident as I forgot to mask them off. Interesting effect. Might be better if it wasn't black, but I don't intend to intentionally repeat it yet. The back was supposed to be a mirror of the front so they lined up, but I screwed up.
Marble cages:
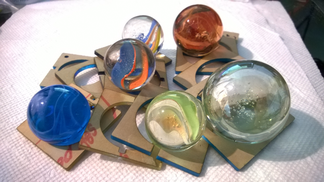
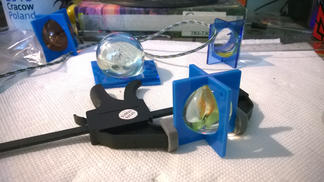
Just an idea I had and wanted to see how it would turn out. The unjointed side is melded with acrylic cement. The largest one had a gap oddly too big to reasonably cement. Also that one is probably a little heavy to trust. The smallest size shown works great.
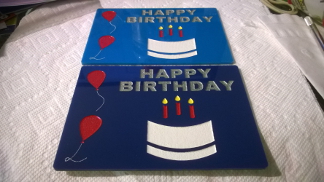
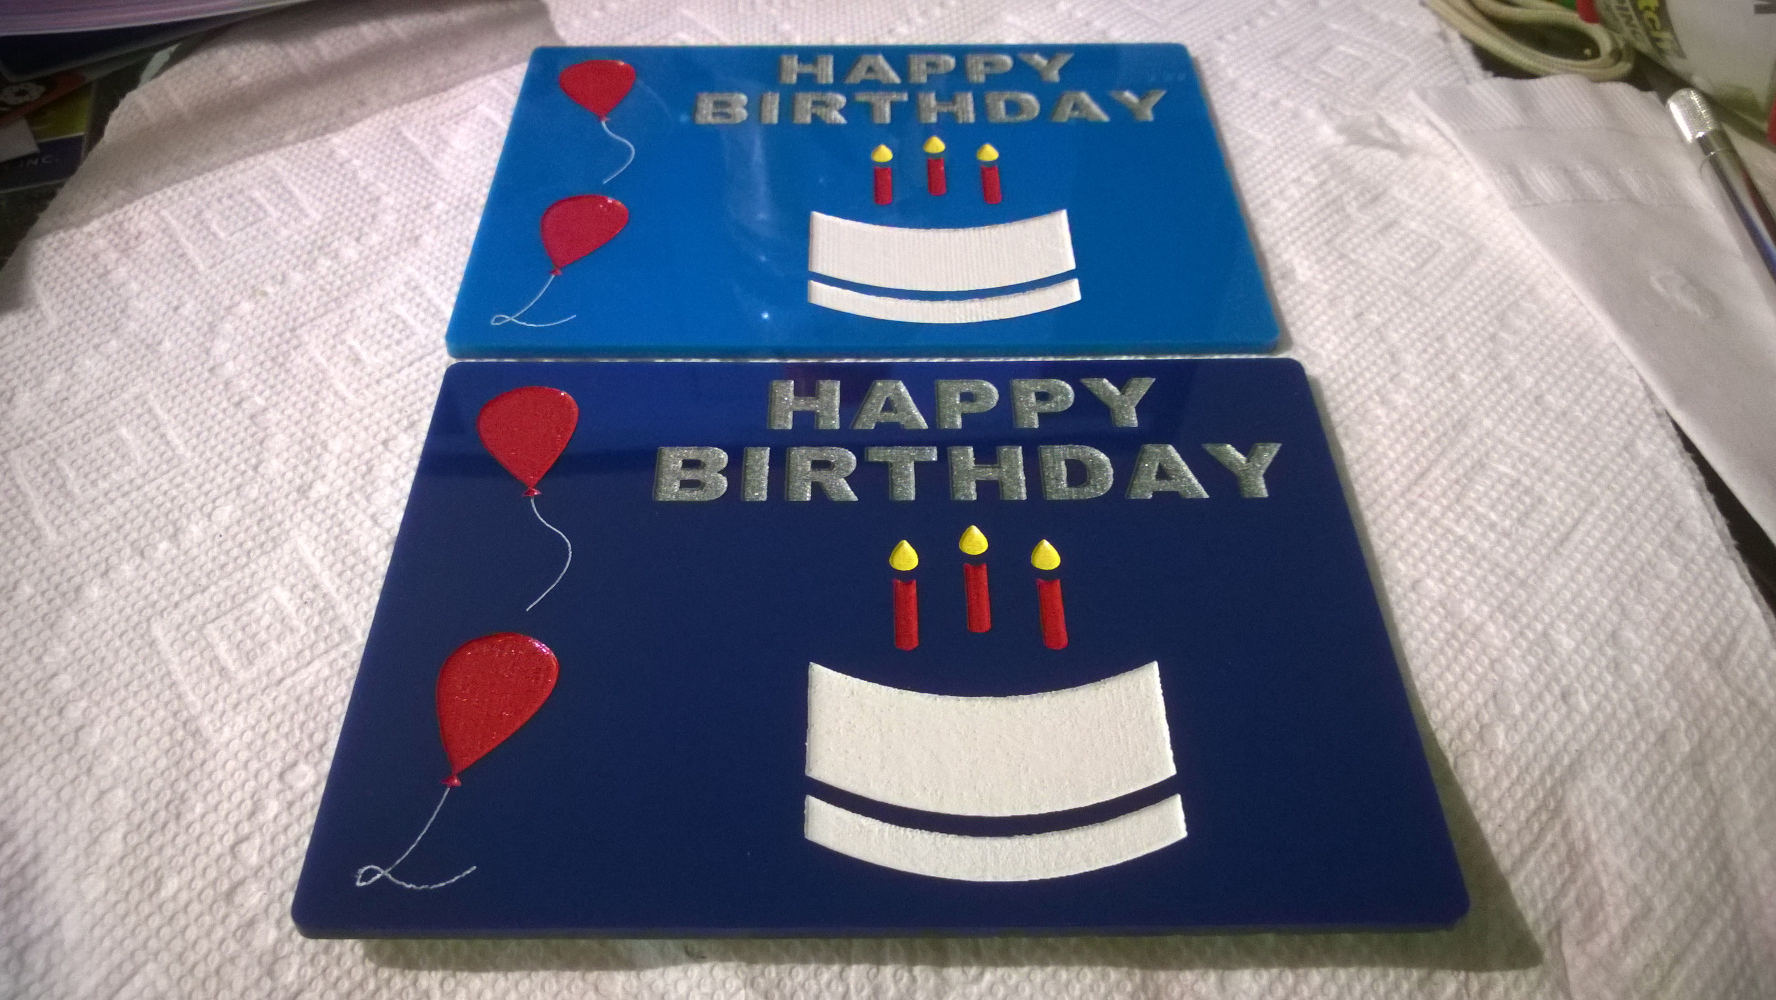
The thing that everyone on Twitter liked:
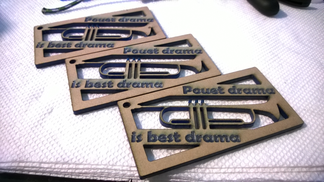
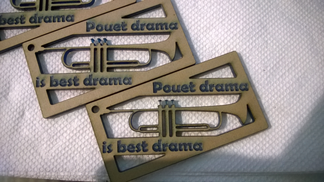
Self explanatory. If you want one, let me know so I can decide if I should make more and if so if in the lighter blue (see above) and/or with a different text color. Cost would be $10 + shipping.
Revision:


Edges and hole were painted by accident as I forgot to mask them off. Interesting effect. Might be better if it wasn't black, but I don't intend to intentionally repeat it yet. The back was supposed to be a mirror of the front so they lined up, but I screwed up.
Marble cages:


Just an idea I had and wanted to see how it would turn out. The unjointed side is melded with acrylic cement. The largest one had a gap oddly too big to reasonably cement. Also that one is probably a little heavy to trust. The smallest size shown works great.
The thing that everyone on Twitter liked:


Self explanatory. If you want one, let me know so I can decide if I should make more and if so if in the lighter blue (see above) and/or with a different text color. Cost would be $10 + shipping.
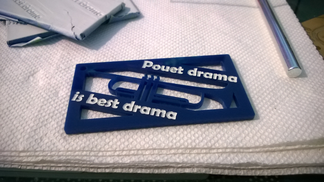
I want the drama thing, because it says the truth :D
Also nice idea with the marble-cages, keep working at that :)
Also nice idea with the marble-cages, keep working at that :)

Transparent revision keyfob looks pretty slick!

damn that looks awesome! Where can I send my money to? :D

sensenstahl, To here! :)
(Dark blue is what the Pouet token uses, "deep sky blue" is shown in the forefront of the marble photos, and cyan is pretty much like the computer color cyan just less eye burning.)
As usual, you can always ping me via http://lasering.design and work out an order via PayPal.
Might buy some end of August/this month if there is any left

I should have plenty. I'm going out to make some and should come back with quite a bit to fill stock. The only thing that matters is to order before the 25th of July if you want your choice of acrylic color in a Pouet drama fob. All stock after that will be dark blue, as anything else would be like the t-shirt size problem.
Ok, so I'm heading out tomorrow to get these done and be able to fulfill orders. This means you can no longer pre-order the Pouet key fob in any acrylic color you like. I've also updated the store inventory counts based on the minimum amount of each I should be coming back with. I'll have 120 Revision ones, and at least 40 Pouet ones. These counts are in addition to the pre-orders.
I've also retooled how I take orders for these products because Squarespace's option handling is funky. This means you now enter the color information during the add-to-cart process. Doing it how I had it before is a real pain in the ass. At any rate, I can now have default values unlike before, so if you decide to just speed through the dialog by clicking the button you'll get a sensible set of color[s].
I've also decided I'm not going to paint the Pouet ones ahead of time, as previous indicated. I'll wait until order time to paint them so that you can still specify whatever text color you like.
--
Sorry for the bump.
This is from some posts back:
Is that something anyone here would buy? I won't make any this trip, but likely will be going again soon. I never thought to ask, but maybe someone would want to send these to someone. It may not make a lot of sense to have me to ship you one to ship to someone else, but if you ordered a few...
I haven't set a price but they'd be probably max of $15 each or something? (including painting) Maybe a multiples discount. Each would come with an envelope of just the right size for free. I'd also offer getting them with no paint and the mask still on them for people who want to do their own painting or changes.
I should note I have all the items I went to make, I haven't forgotten about the two sitting orders. I'll get on those as soon as I can and get them mailed out.
I need to get a new photo up of the Revision key fobs. I figured out the alignment issue and they look great. Also, I've mailed off all existing (2) orders I had.
Also, I had to raise the price of the Pouet ones a bit because unfortunately the laser time for each key fob did not scale when put in to a sheet. I didn't think about the angled text fully. The laser spends more time going back and forth when they're lined up in a nice grid than it does with just one. The operator was very kind that day and capped the laser time for them lower than it should have been but above the cost for one by itself. He also suggested I angle them next time so more of the engraving is lined up and horizontal. To those who bought one before I found this out, don't worry about it. The difference isn't big and you're still good. :)
As always click to see larger versions of these photos.
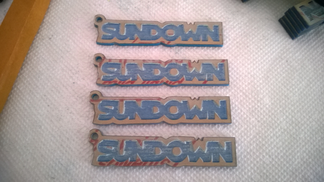
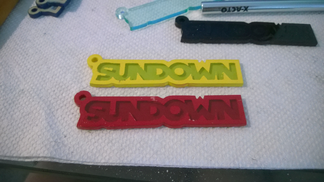
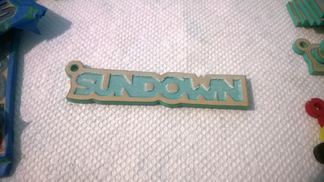
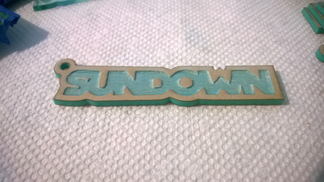
Sundown
Pictures Part 1. I'd already released almost all of these to those watching the Facebook post a few days ago, so they're nothing new. I just didn't want to write all the commentary twice and in a Facebook comment.
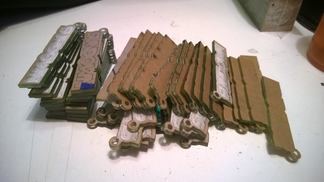
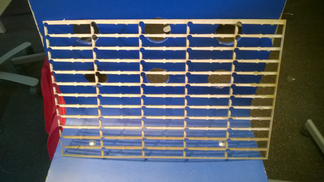
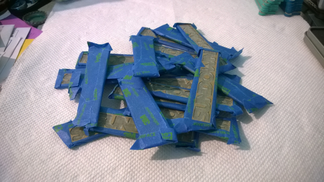
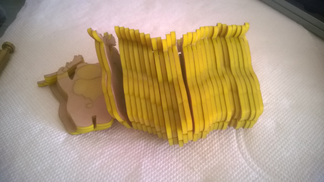
Pile of the key fobs and one of the boards after a run. I cut it pretty close this time for width and height which made alignment hard. There are 180 key fobs in total.
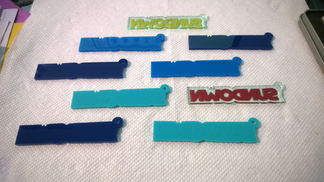
These are all the colored ones. 60 in total, with 4 that were off the left edge of the board, due to the tolerances I noted above. They were recut for free (the hackerspace doesn't charge for things that were there mistake). In the future as before in the past I'll leave more of a margin. Those four should still be usable, but I'll probably give them away as I don't feel I should sell them. I also won't be painting them, unlike the rest.
I use the brush in the upper left of the photo to get rid of any remaining loose acrylic dust before I paint. It works pretty well. So would water, but it wastes a lot of water and may degrade the mask.
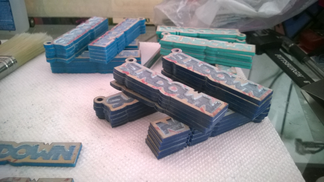
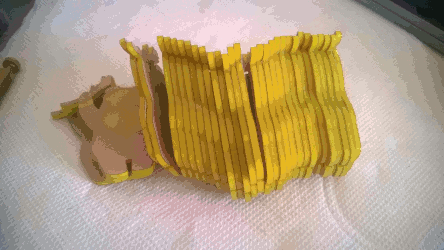
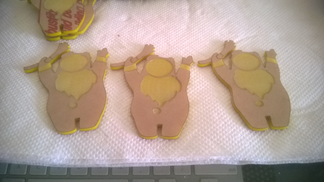
I made 20 in the clear ("Coke bottle") color that weren't engraved and only etched the letters. The idea was to peel off the mask everywhere but the letters and paint the outsides. Unfortunately the light etch setting didn't uniformly cut through the paper and made it hard to remove without also taking off the letters.
To paint the outsides I first roughed up the surfaces a bit with a fine-ish grade of sandpaper that I had handy. I don't know that I need it, but things seem to look and work better if I do. Engraved areas already have that done for them. Due to the mask problem I only did three. The remainder will remain unpainted and available for anyone who wants to one to experiment. As the etching is weak there's not really anything to see if you remove the entire mask. You could get some acrylic paint and write "Sundown" on it yourself, but that's up to you.
The results are pretty good, actually. Only the black didn't work, which is kind of obvious in retrospect. It's just too light absorbing to tell there's an inside like the others unless you have a bright light source really close to it. Unfortunately they didn't dry very fast and in the mean time everything decided to try sticking to them, including themselves. I'd like to try this sort of idea again in the future with better etching and give them more time to dry.
Next up is scraping and masking of the remaining 160 so I can paint them. I wish I had a bit of help for this. If you're wondering
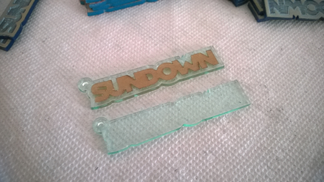
Why do I need to scrap them? Well I noticed with the Start Player tokens I did that after I painted them there were bits against the edges of engraved areas that either fell off or could be knocked loose. This resulted in what looked like an uneven or poor paint job. I later noticed that what caused this existed before I painted, and I noticed it again in the Sundown key fobs. It's caked on acrylic dust that doesn't come off with the brush. It seems to be largely on the top side of the fob only, though I've found some on the left side and rarely the bottom right.
The photo on the left is before scraping. The photo on the right is after. I am able to remove most if not all of the caked acrylic. This should prevent the after-painting problem and even if nobody else notices makes me happy at least that I did a better job.
Unfortunately I have to do this 160 times. Some are better than others, and some are worse, but it still has to be done. Also some designs seem to not have this problem or at least not enough to notice. I've gotten 45 scraped. 28%. Yay?
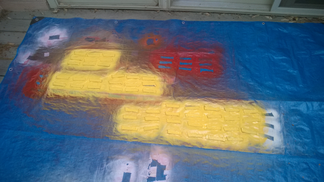
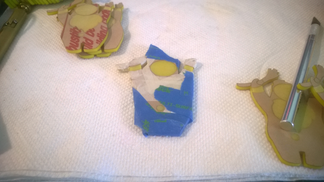
The masking I do afterwards is to cover the sides and edges so I don't paint them. I use spray paint for the moment so it's impossible to ensure I only hit the tops. These will all only be painted in the engraved text areas.
--
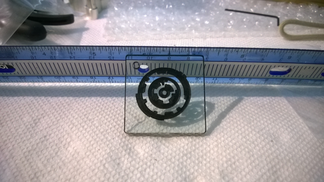
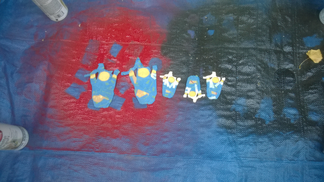
Pictures Part 2 will come first to Facebook, then here, after I'm done painting some or all of the text-painted key fobs. For bothering to read down this far here's a reward: an image of the alignment test piece for the fixed Revision fobs, borrowed from my Twitter feed.
Also, I had to raise the price of the Pouet ones a bit because unfortunately the laser time for each key fob did not scale when put in to a sheet. I didn't think about the angled text fully. The laser spends more time going back and forth when they're lined up in a nice grid than it does with just one. The operator was very kind that day and capped the laser time for them lower than it should have been but above the cost for one by itself. He also suggested I angle them next time so more of the engraving is lined up and horizontal. To those who bought one before I found this out, don't worry about it. The difference isn't big and you're still good. :)
As always click to see larger versions of these photos.
Sundown
Pictures Part 1. I'd already released almost all of these to those watching the Facebook post a few days ago, so they're nothing new. I just didn't want to write all the commentary twice and in a Facebook comment.


Pile of the key fobs and one of the boards after a run. I cut it pretty close this time for width and height which made alignment hard. There are 180 key fobs in total.


These are all the colored ones. 60 in total, with 4 that were off the left edge of the board, due to the tolerances I noted above. They were recut for free (the hackerspace doesn't charge for things that were there mistake). In the future as before in the past I'll leave more of a margin. Those four should still be usable, but I'll probably give them away as I don't feel I should sell them. I also won't be painting them, unlike the rest.
I use the brush in the upper left of the photo to get rid of any remaining loose acrylic dust before I paint. It works pretty well. So would water, but it wastes a lot of water and may degrade the mask.

I made 20 in the clear ("Coke bottle") color that weren't engraved and only etched the letters. The idea was to peel off the mask everywhere but the letters and paint the outsides. Unfortunately the light etch setting didn't uniformly cut through the paper and made it hard to remove without also taking off the letters.


To paint the outsides I first roughed up the surfaces a bit with a fine-ish grade of sandpaper that I had handy. I don't know that I need it, but things seem to look and work better if I do. Engraved areas already have that done for them. Due to the mask problem I only did three. The remainder will remain unpainted and available for anyone who wants to one to experiment. As the etching is weak there's not really anything to see if you remove the entire mask. You could get some acrylic paint and write "Sundown" on it yourself, but that's up to you.

The results are pretty good, actually. Only the black didn't work, which is kind of obvious in retrospect. It's just too light absorbing to tell there's an inside like the others unless you have a bright light source really close to it. Unfortunately they didn't dry very fast and in the mean time everything decided to try sticking to them, including themselves. I'd like to try this sort of idea again in the future with better etching and give them more time to dry.


Next up is scraping and masking of the remaining 160 so I can paint them. I wish I had a bit of help for this. If you're wondering
Why do I need to scrap them? Well I noticed with the Start Player tokens I did that after I painted them there were bits against the edges of engraved areas that either fell off or could be knocked loose. This resulted in what looked like an uneven or poor paint job. I later noticed that what caused this existed before I painted, and I noticed it again in the Sundown key fobs. It's caked on acrylic dust that doesn't come off with the brush. It seems to be largely on the top side of the fob only, though I've found some on the left side and rarely the bottom right.
The photo on the left is before scraping. The photo on the right is after. I am able to remove most if not all of the caked acrylic. This should prevent the after-painting problem and even if nobody else notices makes me happy at least that I did a better job.
Unfortunately I have to do this 160 times. Some are better than others, and some are worse, but it still has to be done. Also some designs seem to not have this problem or at least not enough to notice. I've gotten 45 scraped. 28%. Yay?
The masking I do afterwards is to cover the sides and edges so I don't paint them. I use spray paint for the moment so it's impossible to ensure I only hit the tops. These will all only be painted in the engraved text areas.
--
Pictures Part 2 will come first to Facebook, then here, after I'm done painting some or all of the text-painted key fobs. For bothering to read down this far here's a reward: an image of the alignment test piece for the fixed Revision fobs, borrowed from my Twitter feed.

Oh, and I forgot to mention. Sometimes the sound of scraping reminds me of a similar sound from the dentist's office when they're going at your teeth. It's not pleasant and I don't have anywhere near the worst teeth. Oh, and being reminded of it isn't pleasant either.
Oh the Sundown ones look really nice. Good work. My Drama is in the mail btw, thanks :D
Just a note here for those who missed it, I released a demo at Sundown called lasering dreams that shows off a bit of the process I use to make these.
The photos used in the demo are repeated below. A higher quality version of the video from the demo can be downloaded from my site. However be aware it is ~65MB (1280x720, 60fps). This copy was reduced by 60% to make the demo itself less hefty. I waited to release these so it couldn't be claimed the material in my demo had been released before.

I rather liked how the medium blue and yellow turned out as well as any of the colors in clear acrylic. I did sell some at the party but I donated the remainder to rc55 to do with what he wishes, perhaps to sell and help augment next year's funding. I placed no strings and got nothing in return other than what people had already bought.
Finally I'm also thinking of possibly going more to tokens in the future, as I've probably tapped out key fobs. However I still have plenty of Revision and Pouet fobs just check the store. The local hackerspace group trying to start is closer to having a building, but perhaps not until next year even if we pull off all the opportunities currently in our lap. So no personal laser cutter soon it seems.
The photos used in the demo are repeated below. A higher quality version of the video from the demo can be downloaded from my site. However be aware it is ~65MB (1280x720, 60fps). This copy was reduced by 60% to make the demo itself less hefty. I waited to release these so it couldn't be claimed the material in my demo had been released before.


I rather liked how the medium blue and yellow turned out as well as any of the colors in clear acrylic. I did sell some at the party but I donated the remainder to rc55 to do with what he wishes, perhaps to sell and help augment next year's funding. I placed no strings and got nothing in return other than what people had already bought.
Finally I'm also thinking of possibly going more to tokens in the future, as I've probably tapped out key fobs. However I still have plenty of Revision and Pouet fobs just check the store. The local hackerspace group trying to start is closer to having a building, but perhaps not until next year even if we pull off all the opportunities currently in our lap. So no personal laser cutter soon it seems.
I was asked to wait until after the party, so I did. Now that it is over, I'd like to show you what is possibly the most complex item I've done to date.
As TRSAC and sceners who to go such parties seem to like GIFs, I've turned a bunch of the progress shots in to one. (There's two more at the end of this post.) If you'd prefer to look at a bunch of static images just scroll down for the individuals.
Progress shots (left to right, top to bottom):
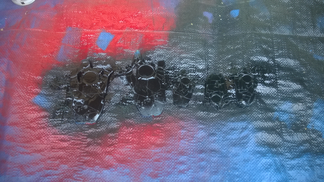
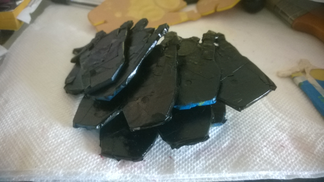
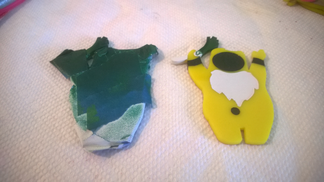
This one was tough because of the size and detail involved that needed to be separate colors. The black wristbands and leek are painted down the sides but there is no paint on the back of these. I originally wanted the leek to have the forked line between the white and green like the original version on the TRSAC website but found it to be too complicated to mask. Instead I turned it into a straight line which, depending on how good my masking was, would bleed or blend anyway. I also removed the shot glass from the left hand as I decided it would be too small to mask and detail with spray paint.
The first batch to be painted was stripped down all the way after each color then remasked. Later batches I got a bit smarter and left the masking on that didn't need to come off for the next color and engineered the mask around the leek so I had to do minimal work to kick it back out to the tarp for the next color. Accidentally finding some pre-cut skinny masking tape at an art shop made this work easier.
It didn't happen too often, but sometimes there was a non-obvious gap in my masking or a bit of tape that unsealed during painting which allowed paint to get on the edges where I didn't want it. If it wasn't going to be covered up by another color, I would usually attempt to scratch it off then take a very fine sandpaper and buff it out.
These are around ~2.26" (5.75cm) at their widest point by ~3" (7.62cm) tall. I was able to flip some upside down and alternate them to get them closer together and allow me to make an impressive 32 out of my standard 11x17" sheet of acrylic.
Specials:
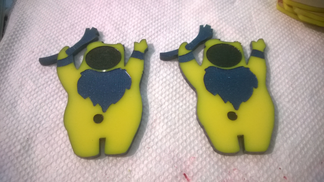
I had two where I thought I could get my masking done faster if I ignored the wristbands and did them in a second pass. After doing two I figured that would actually increase the amount of work I had to do, set those aside, and masked off the rest so I could do all the black bits in one pass. After I'd finished the others I decided to be rather l̶a̶z̶y̶ creative, cover up the parts I'd already done, and spray them with metallic blue. Their entire edge is metallic blue as much as I could manage.
I also happened to take two shots relatively close to each other with these two in different poses, so here's another silly GIF:
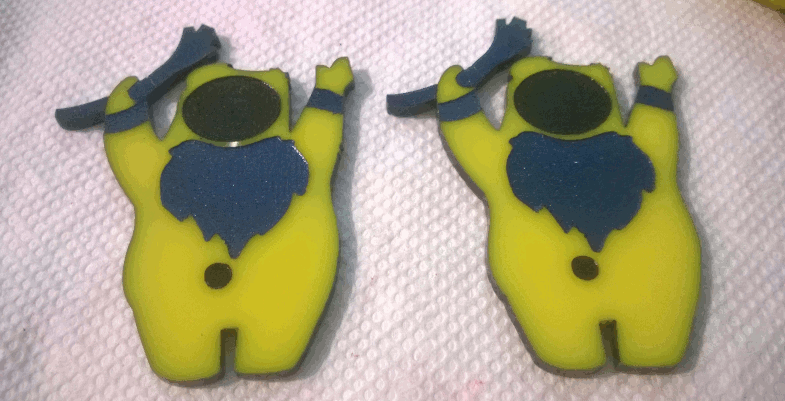
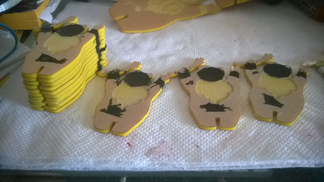
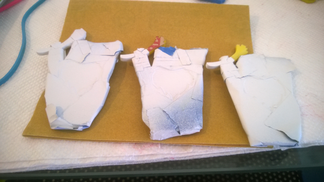
Prototypes/Collectors Edition:

The prototypes were much larger, and as such they kept the details such as the music notes. They were ~3.81" (9.68cm) at their widest to ~5" (12.7cm) tall. I was only able to fit ten per sheet even with the same tessellation strategy as the smaller ones. This was one of the reasons the smaller size was selected as their laser time and needing to make more sheets to get the required amount would cost a lot more.
I only made three of the prototypes and did so to convince the TRSAC organizers converting their logo to a laser cut object was easier than it seemed, assuming loss of some details was acceptable, and that it could also look pretty good too. After laser cutting the main batch of smaller ones I realized how much work this entailed over just painting the first of the three prototypes for the proof of concept.
Overall I'd say they turned out pretty good and the end result outweighs all the work I had to do, though there are some process improvements I noted above that I wish I'd thought to do from the outset. In addition, if I did this over, I would have gone to get these laser cut the weekend before Labor Day weekend. The hackerspace was closed the entire Labor Day weekend*, which I knew about ahead of time, and I could have used that weekend to get a jump start on prepwork if all of the parts had been made the weekend prior. Things did work out timewise, but I was still a little worried.
* No complaints. They're open noon to midnight almost every day of the year, so it's not like this wasn't deserved.
Final bits:
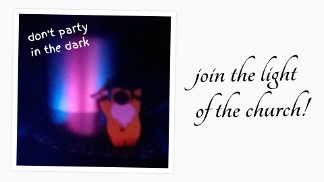
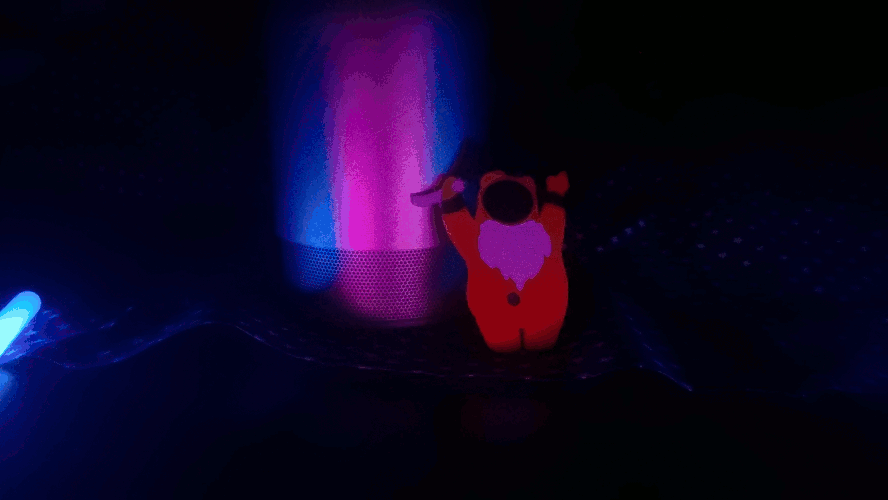
I tried to take some "glamour" shots of these, but I think I should just stick to trying to build a lightbox and shoot photos there. The photos were taken in the dark illuminated by a few glow sticks. As a joke I turned one of them, possibly with some more blur added for some reason, in to a beam slide:
I also turned two of the better dark images into a flashing GIF:
--
Finally I will admit as far as GIFs go the ones in this post are fairly boring, but I tried.
Anyway, that's it for me. Stay tuned. I'll be back with more laser cut stuff when I'm able. :)
As TRSAC and sceners who to go such parties seem to like GIFs, I've turned a bunch of the progress shots in to one. (There's two more at the end of this post.) If you'd prefer to look at a bunch of static images just scroll down for the individuals.
Progress shots (left to right, top to bottom):


This one was tough because of the size and detail involved that needed to be separate colors. The black wristbands and leek are painted down the sides but there is no paint on the back of these. I originally wanted the leek to have the forked line between the white and green like the original version on the TRSAC website but found it to be too complicated to mask. Instead I turned it into a straight line which, depending on how good my masking was, would bleed or blend anyway. I also removed the shot glass from the left hand as I decided it would be too small to mask and detail with spray paint.
The first batch to be painted was stripped down all the way after each color then remasked. Later batches I got a bit smarter and left the masking on that didn't need to come off for the next color and engineered the mask around the leek so I had to do minimal work to kick it back out to the tarp for the next color. Accidentally finding some pre-cut skinny masking tape at an art shop made this work easier.
It didn't happen too often, but sometimes there was a non-obvious gap in my masking or a bit of tape that unsealed during painting which allowed paint to get on the edges where I didn't want it. If it wasn't going to be covered up by another color, I would usually attempt to scratch it off then take a very fine sandpaper and buff it out.
These are around ~2.26" (5.75cm) at their widest point by ~3" (7.62cm) tall. I was able to flip some upside down and alternate them to get them closer together and allow me to make an impressive 32 out of my standard 11x17" sheet of acrylic.
Specials:

I had two where I thought I could get my masking done faster if I ignored the wristbands and did them in a second pass. After doing two I figured that would actually increase the amount of work I had to do, set those aside, and masked off the rest so I could do all the black bits in one pass. After I'd finished the others I decided to be rather l̶a̶z̶y̶ creative, cover up the parts I'd already done, and spray them with metallic blue. Their entire edge is metallic blue as much as I could manage.
I also happened to take two shots relatively close to each other with these two in different poses, so here's another silly GIF:
Prototypes/Collectors Edition:

The prototypes were much larger, and as such they kept the details such as the music notes. They were ~3.81" (9.68cm) at their widest to ~5" (12.7cm) tall. I was only able to fit ten per sheet even with the same tessellation strategy as the smaller ones. This was one of the reasons the smaller size was selected as their laser time and needing to make more sheets to get the required amount would cost a lot more.
I only made three of the prototypes and did so to convince the TRSAC organizers converting their logo to a laser cut object was easier than it seemed, assuming loss of some details was acceptable, and that it could also look pretty good too. After laser cutting the main batch of smaller ones I realized how much work this entailed over just painting the first of the three prototypes for the proof of concept.
Overall I'd say they turned out pretty good and the end result outweighs all the work I had to do, though there are some process improvements I noted above that I wish I'd thought to do from the outset. In addition, if I did this over, I would have gone to get these laser cut the weekend before Labor Day weekend. The hackerspace was closed the entire Labor Day weekend*, which I knew about ahead of time, and I could have used that weekend to get a jump start on prepwork if all of the parts had been made the weekend prior. Things did work out timewise, but I was still a little worried.
* No complaints. They're open noon to midnight almost every day of the year, so it's not like this wasn't deserved.
Final bits:
I tried to take some "glamour" shots of these, but I think I should just stick to trying to build a lightbox and shoot photos there. The photos were taken in the dark illuminated by a few glow sticks. As a joke I turned one of them, possibly with some more blur added for some reason, in to a beam slide:

I also turned two of the better dark images into a flashing GIF:
--
Finally I will admit as far as GIFs go the ones in this post are fairly boring, but I tried.
Anyway, that's it for me. Stay tuned. I'll be back with more laser cut stuff when I'm able. :)
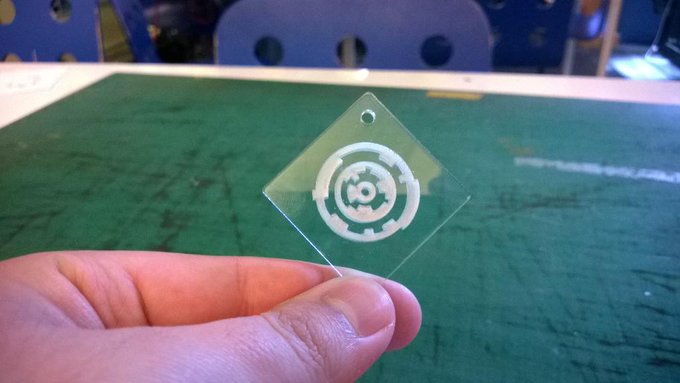
This weekend I was very happy to add piece #2 to my nascent Starchaser collection :)

COLLECTOR'S EDITION!
COLLECTOR'S EDITION!
